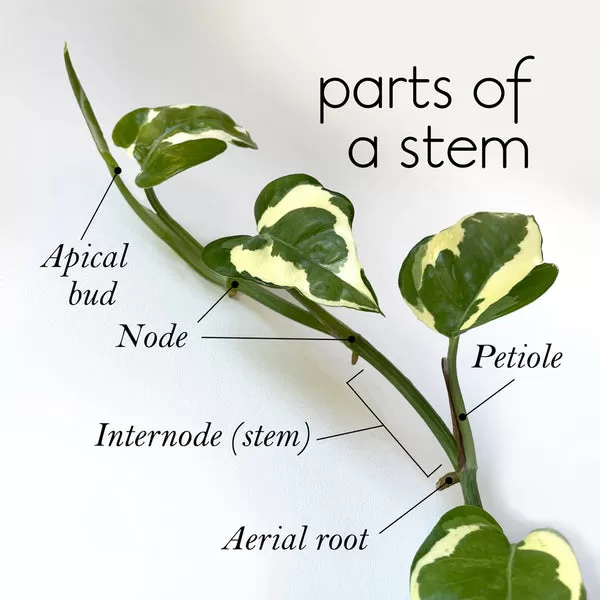
Diagram showing plant stem nodes and parts on a Pothos N'Joy plant, highlighting where new roots grow for propagation
Ready to expand your indoor jungle or share the plant love with friends? Stepping into the world of plant propagation can feel a bit intimidating at first – making that first cut, wondering if it will actually work! But trust us, it’s incredibly rewarding. One of the most popular and successful ways to create new plants is by understanding how to propagate with stem nodes. This guide will walk you through the simple process, focusing on the easy water propagation method, perfect for many common houseplants. Forget the fear; let’s grow some babies!
Contents
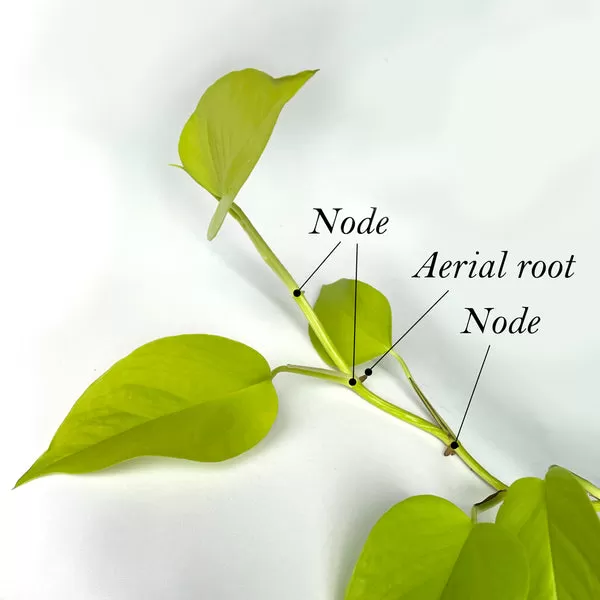
Think of plant nodes as tiny powerhouses packed with potential. These are the bumps or rings on the stem where leaves, branches, or even aerial roots emerge. More importantly, they contain the meristematic cells needed to sprout new roots and shoots. Learning to identify nodes is the first crucial step when you want to know how to propagate with stem nodes successfully. Look for these slightly swollen areas along the stem.
Sometimes you’ll even see small bumps or nubs right at the node – these are often rudimentary aerial roots. Including a section of stem with an aerial root can sometimes give your cutting a head start, as these roots are already adapted to absorbing moisture from the air and can transition easily to absorbing water from your propagation vessel.
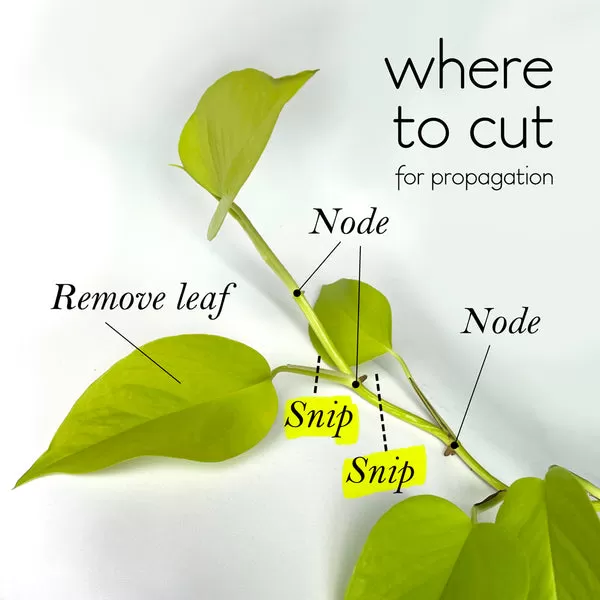
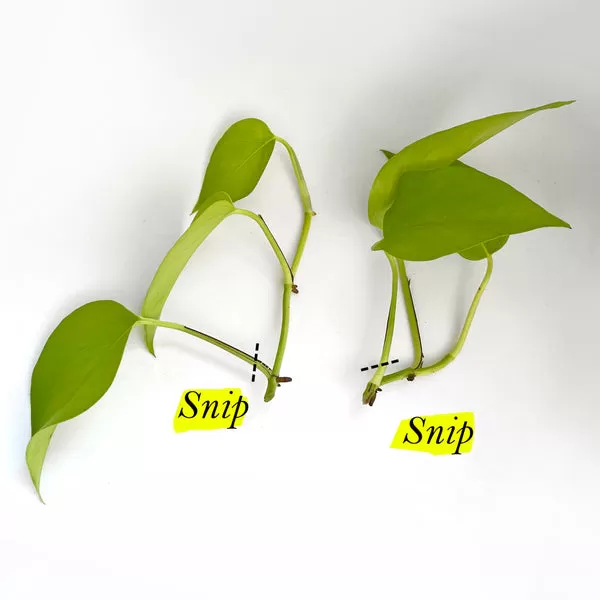
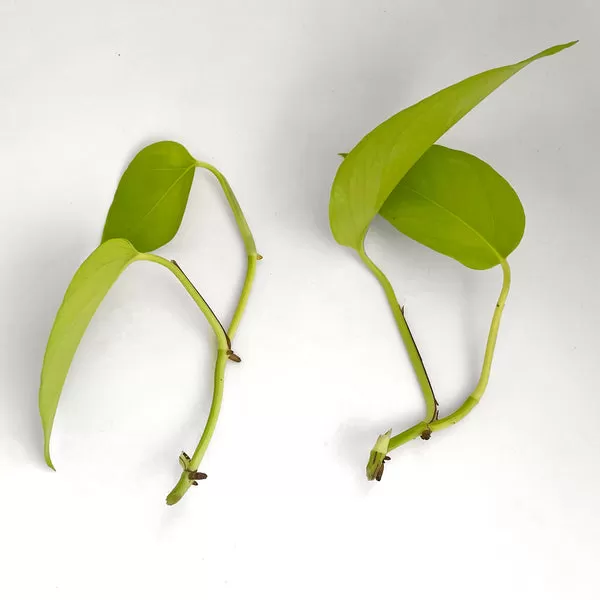
Once you’ve located the nodes you want to use, it’s time for the exciting part: taking your cutting! Using clean, sharp pruners or scissors is vital to make a clean cut and prevent introducing disease to either the parent plant or your new cutting. Aim to cut the stem about 1/4 to 1/2 inch (approx. 0.5-1 cm) below a node. Including at least one node (preferably two) on your cutting increases your chances of success, as each node is a potential rooting site. You can often get multiple cuttings from a single long stem by cutting below each node or every second node.
While not strictly necessary, some experienced propagators recommend cutting the stem at a slight angle (around 45 degrees) rather than straight across. The theory is that this angled cut provides more surface area for potential root development while also helping the cut seal quickly.
Before placing your fresh cutting into its rooting medium, you need to do a little prep work. Carefully remove any leaves that would be submerged in water or touching the propagation medium (like soil or moss). This is crucial to prevent those leaves from rotting and contaminating the water or substrate, which can lead to fungal issues. Keep a couple of healthy leaves at the top of the cutting to help with photosynthesis and provide energy for root development. Avoid leaving too many leaves, as the cutting won’t have roots to support them all, potentially stressing the plant.
While many plants will root from nodes in water without any help, using a rooting hormone can significantly increase your success rate and speed up root development, especially for plants that are slower to root or if you’re taking cuttings during a less ideal season. These products contain compounds (like IBA or NAA) that encourage root formation and sometimes contain antifungal agents to prevent rot. Available in powders or gels, simply dip the freshly cut, node-containing end of your stem into the hormone, tapping off any excess, before placing it in your chosen medium.
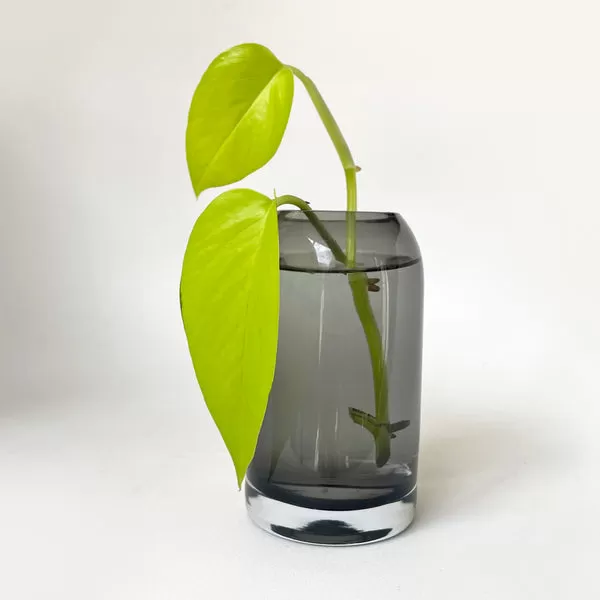
Water propagation is fantastic for beginners because it lets you see the magic happen right before your eyes! Choose a clean glass jar, vase, or dedicated propagation vessel that can hold the cutting upright with the node submerged but leaves safely above water. A vessel with a narrower neck can help keep the cutting in place. Fill the vessel with clean water.
Place your vessel in a location that receives bright, indirect light. Avoid direct sun, which can overheat the water and scorch the leaves. Warmth is a major factor in root growth, so finding a warm spot (away from cold drafts) or even using a propagation heat mat (especially in cooler months) can make a big difference in how quickly your cutting roots.
Keep a close eye on the water level in your propagation vessel and top it up as needed due to evaporation. It’s also a good practice to change the water completely about once a week. This replenishes oxygen for the developing roots, removes any potential buildup from the stem, and keeps the environment fresh.
Once you see those first tiny roots emerge from the nodes, you can start adding a very diluted, gentle liquid fertilizer formulated for cuttings or hydroponics to the fresh water each time you change it. This gives the new roots and future foliage the essential nutrients they need to grow strong and healthy.
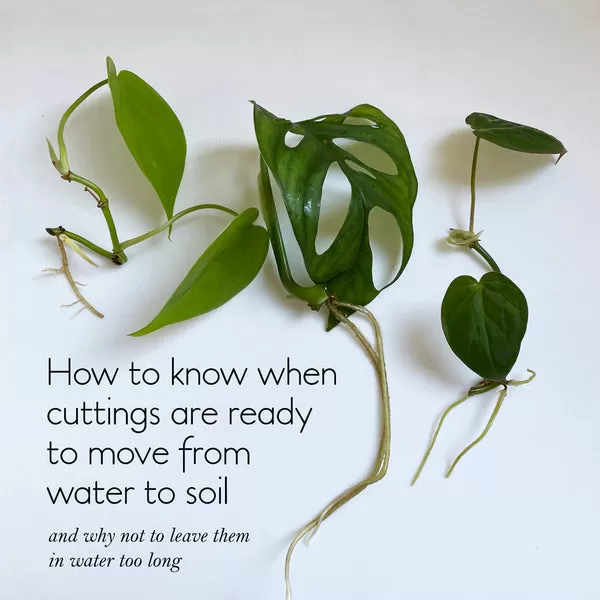
Watching roots grow is addictive, but there comes a point when it’s best to move your rooted cutting from water to a more permanent home in soil or another substrate. Water roots are typically more fragile and adapted to their environment than soil roots, and leaving a cutting in water too long can make the transition more difficult, sometimes leading to transplant shock.
Aim to pot up your cutting when the main roots growing from the nodes are about 1-2 inches (3-5 cm) long, or when you start seeing small side branches developing off the main root. Use a small pot appropriate for the cutting size and fill it with a well-draining potting mix suitable for the plant type. Gently plant the rooted cutting, burying the roots and the node area from which they grew. Water lightly and place it back in a spot with bright, indirect light. Keep the soil consistently moist (but not soggy) for the first week or two to help the water roots adjust to the soil environment before transitioning to your plant’s normal watering schedule.
Patience is a virtue in propagation! The time it takes for roots to appear from stem nodes varies greatly depending on the plant species, environmental conditions (especially warmth), and whether you used rooting hormone. Some plants like Pothos, Philodendron, and Syngonium are fast rooters and might show signs within one to three weeks. Others, like Hoyas or Monsteras, can take four to six weeks or even longer. Providing consistent warmth, bright indirect light, and fresh water are the best ways to encourage faster root development. Don’t be discouraged if it’s slow; just keep the conditions right.
Many vining and trailing houseplants are excellent candidates for node propagation in water. Some favorites include:
Let’s take a closer look at a couple of these easy-to-propagate plants:
Learning how to propagate with stem nodes is a fundamental skill for any aspiring plant parent. It’s a simple yet magical process that lets you transform one plant into many, witnessing new life emerge from a humble stem cutting. By understanding where the nodes are and providing basic care (clean cut, fresh water, warmth, light), you’ll soon be celebrating your first successfully rooted cuttings. Don’t be afraid to give it a try! It’s a rewarding way to grow your collection and connect with the lifecycle of your plants. Have you tried propagating with stem nodes? Share your experiences or ask questions in the comments below!
Wichtigste Erkenntnisse: Der Anbau eigener gemischter Blattsalate bietet unübertroffene Frische und Geschmack – direkt aus…
Here's how implementing no-dig techniques can transform your container gardening: Build Richer Soil: Layers of…
Healthy soil is teeming with beneficial microbes that act as a natural defense system for…
Transform your patio into a vibrant, wildlife-friendly oasis. Discover how to create beautiful, low-maintenance container…
Unlock the secret to a beautiful, resilient garden with Sedum & Yarrow blends. Discover why…
Beat the Heat: Discover resilient perennials that thrive in containers during the hottest summer months,…