Ready to multiply your favorite houseplants without spending a dime? Propagation in mason jars is one of the simplest, most rewarding ways to grow your indoor jungle!
Here’s what you’ll discover:
- Why mason jars are a fantastic choice for propagating plants.
- A simple, step-by-step guide to rooting plant cuttings in water.
- Which common houseplants are perfect for jar propagation.
- Essential tips and tricks for successful rooting.
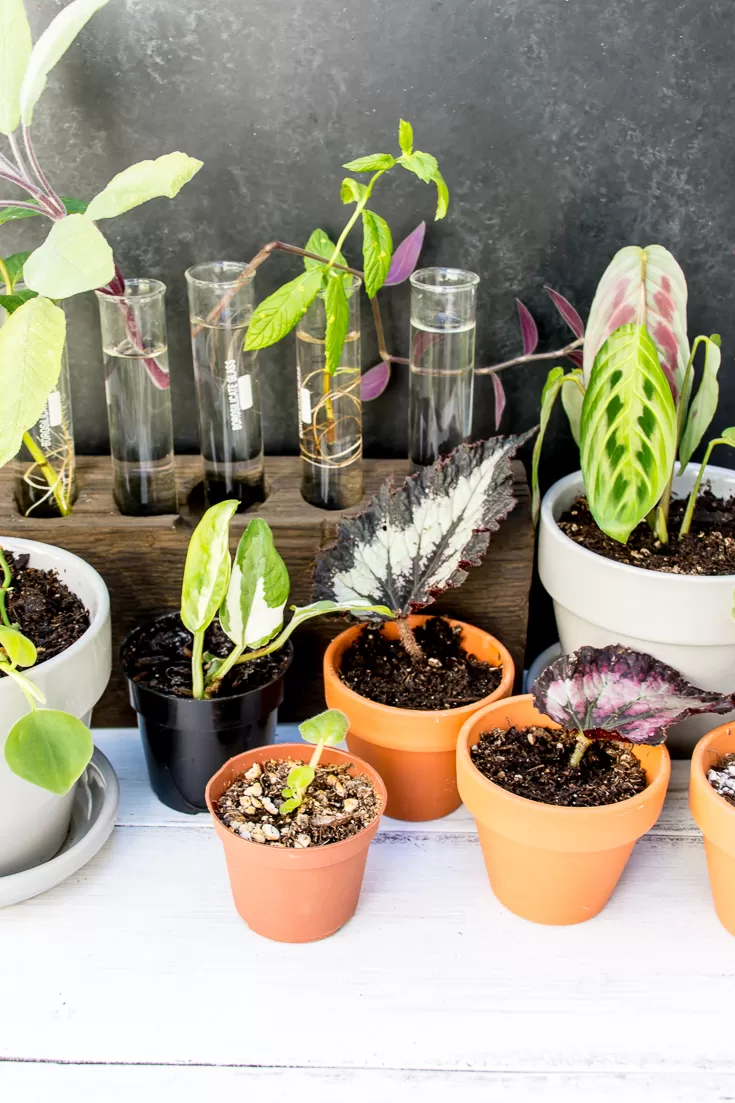
There’s a unique joy in watching new roots sprout from a simple stem cutting. It feels a bit like magic! For many plant lovers, myself included, water propagation quickly becomes an addictive hobby. And while fancy propagation stations exist, sometimes the best tools are already sitting in your kitchen cupboard. That’s right, good old mason jars! I’ve filled countless shelves with cuttings happily growing roots in various glass containers, proving just how effective and accessible propagation in mason jars can be. Let’s dive into how you can start your own plant-growing adventure using these versatile jars.
 Potted plant next to several glass jars holding plant cuttings in water
Contents
- What is Plant Propagation?
- Why Choose Mason Jars for Propagation?
- Getting Started: Propagation in Mason Jars Step-by-Step
- 1. Select a Healthy Mother Plant
- 2. Take Your Cutting
- 3. Prepare Your Mason Jar
- 4. Place the Cutting in the Jar
- 5. Find the Perfect Spot
- 6. Monitor and Wait
- 7. When Are They Ready for Soil?
- Best Plants for Propagation in Mason Jars
- Tips for Success with Propagation in Mason Jars
- Displaying Your Mason Jar Creations
- Conclusion
What is Plant Propagation?
At its heart, plant propagation is simply creating new plants from existing ones. Instead of planting seeds, you take a piece of a mature plant – often a stem cutting – and encourage it to grow roots and develop into a whole new individual plant. It’s nature’s incredible ability to regenerate, harnessed for your home garden!
There are several methods, but one of the most popular and beginner-friendly is water propagation. This is where our trusty mason jars come in.
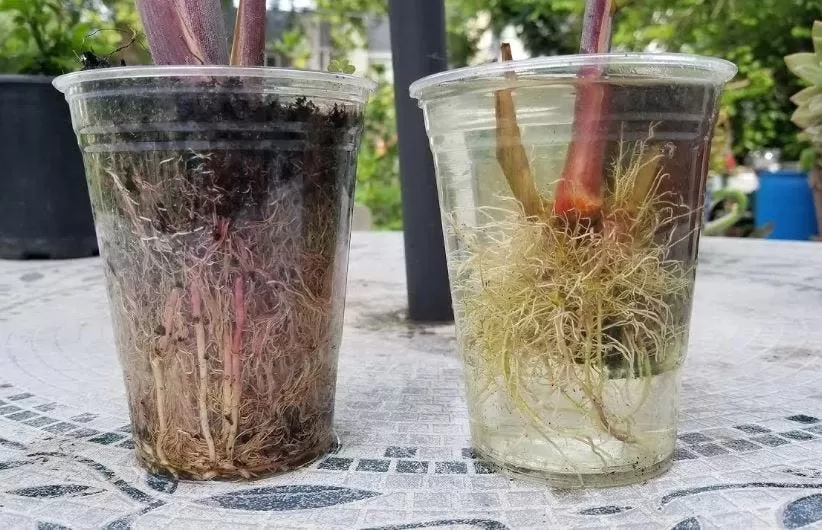
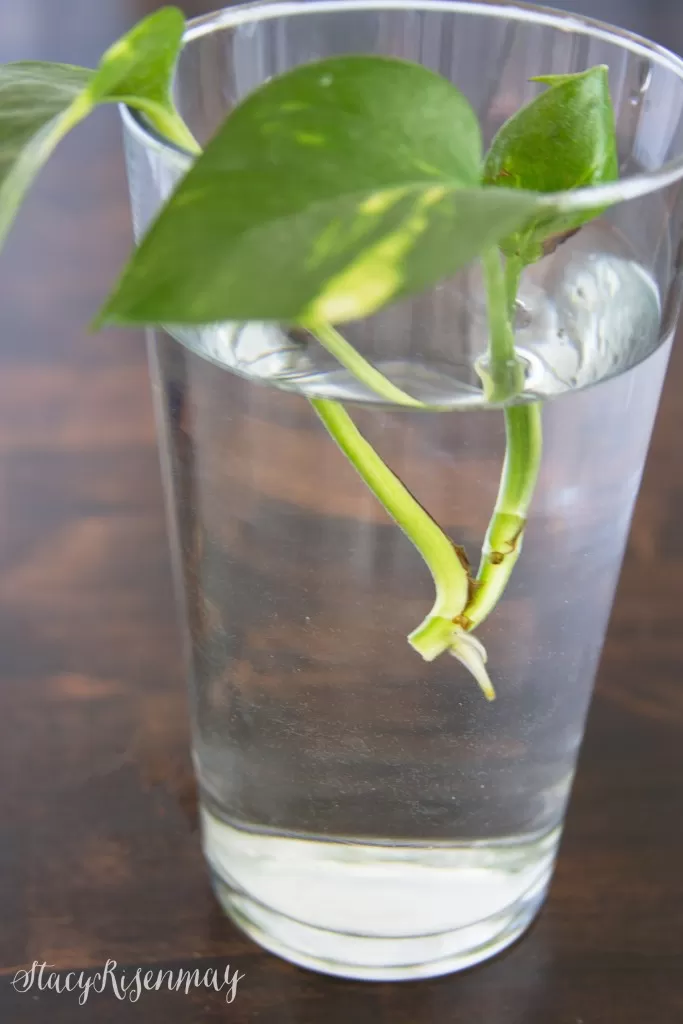 Close-up of plant roots growing in clear water inside a glass jar
Why Choose Mason Jars for Propagation?
Mason jars and other clear glass containers are incredibly well-suited for water propagation for several reasons:
- Accessibility: Most people already own them! No need for special equipment to get started.
- Visibility: The clear glass allows you to easily monitor root development. Watching those first tiny roots emerge is incredibly exciting and helps you know when your cutting is ready for soil.
- Stability: Mason jars have a sturdy base, reducing the risk of tipping over, which is important for taller cuttings.
- Versatility: They come in various sizes, accommodating everything from small leaf cuttings to larger stem sections. Plus, they look quite charming lined up on a windowsill!
Getting Started: Propagation in Mason Jars Step-by-Step
Ready to give it a try? Here’s the simple process:
1. Select a Healthy Mother Plant
Choose a vibrant, healthy plant from which to take your cutting. Avoid plants showing signs of stress, pests, or disease. A strong mother plant gives your cutting the best chance of success.
2. Take Your Cutting
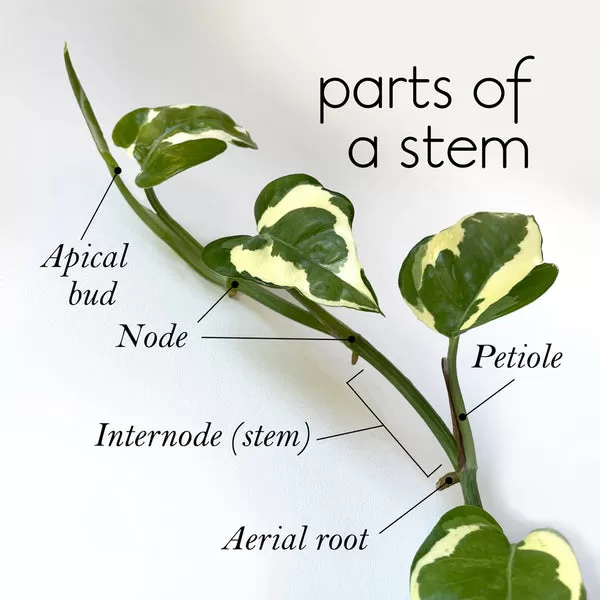
Using clean, sharp scissors or pruning shears, take a stem cutting. The ideal length varies by plant, but generally, a cutting with 2-4 nodes (the points on the stem where leaves or aerial roots emerge) is good. Make your cut just below a node. Remove any leaves that would be submerged in water to prevent rot.
3. Prepare Your Mason Jar
Wash your mason jar thoroughly. Fill it with clean, room-temperature water. Tap water is usually fine, but if your tap water is heavily chlorinated, letting it sit out for 24 hours before using can help.
4. Place the Cutting in the Jar
Carefully place your cutting in the mason jar, ensuring that at least one node is submerged in the water. The leaves should be above the waterline.
5. Find the Perfect Spot
Place your jar in a location that receives bright, indirect light. Avoid direct sunlight, which can overheat the water and stress the cutting. A windowsill that gets morning or afternoon sun, or a spot near a bright window, is usually ideal.
6. Monitor and Wait
This is where the magic happens! Check the water level periodically and top it up as needed. If the water becomes cloudy, change it out for fresh water. Be patient – rooting times vary greatly depending on the plant species and conditions. You should start seeing roots emerge within a few weeks to a couple of months.
7. When Are They Ready for Soil?
Once the roots are at least an inch or two long and have developed some secondary roots branching off, your cutting is generally ready to be transplanted into soil. Transitioning them gradually is key to success.
Best Plants for Propagation in Mason Jars
Many popular houseplants root readily in water. Here are a few favorites mentioned in the original text, plus some additional common ones that thrive using this method:
- Pothos
- Scientific Name: Epipremnum aureum
- Common Names: Devil’s Ivy, Golden Pothos
- Zone: 10-12
- Light: Low to Bright Indirect
- Humidity: Moderate
- Water: Drought tolerant (when established in soil) – easy water prop!
- Philodendron
- Scientific Name: Philodendron spp. (many varieties)
- Common Names: Heartleaf Philodendron, Brasil, Pink Princess
- Zone: 10-11
- Light: Low to Bright Indirect
- Humidity: Moderate to High
- Water: Keep soil evenly moist (when established in soil) – roots quickly in water!
- Snake Plant
- Scientific Name: Sansevieria spp. (now Dracaena spp.)
- Common Names: Mother-in-Law’s Tongue
- Zone: 9-11
- Light: Low to Bright Indirect
- Humidity: Low to Moderate
- Water: Very drought tolerant (when established in soil) – leaf cuttings can take time but are rewarding!
- Monstera
- Scientific Name: Monstera deliciosa (and others)
- Common Names: Swiss Cheese Plant
- Zone: 10-12
- Light: Bright Indirect
- Humidity: Moderate to High
- Water: Keep soil evenly moist (when established in soil) – look for aerial roots on cuttings!
- Spider Plant
- Scientific Name: Chlorophytum comosum
- Common Names: Airplane Plant, Spider Ivy
- Zone: 9-11
- Light: Medium to Bright Indirect
- Humidity: Moderate
- Water: Keep soil evenly moist (when established in soil) – propagatges from ‘spiderettes’ easily!
- Tradescantia
- Scientific Name: Tradescantia spp.
- Common Names: Wandering Jew, Inch Plant
- Zone: 9-11 (varies by species)
- Light: Bright Indirect (can tolerate lower light but colors fade)
- Humidity: Moderate
- Water: Keep soil evenly moist (when established in soil) – extremely easy to root in water!
Tips for Success with Propagation in Mason Jars
- Cleanliness Matters: Always use clean jars and tools to prevent bacterial or fungal growth.
- Water Changes: While some people rarely change the water, refreshing it every week or two can provide fresh oxygen and prevent stagnation, encouraging healthier root growth.
- Patience is Key: Don’t get discouraged if roots don’t appear overnight. Some plants are faster than others. Providing consistent conditions is more important than fussing over them daily.
- Monitor Water Level: Ensure the node(s) remain submerged.
- Transition Carefully: When moving a water-rooted plant to soil, the roots are fragile and accustomed to a watery environment. Keep the soil consistently moist for the first week or two after potting to help the plant adjust.
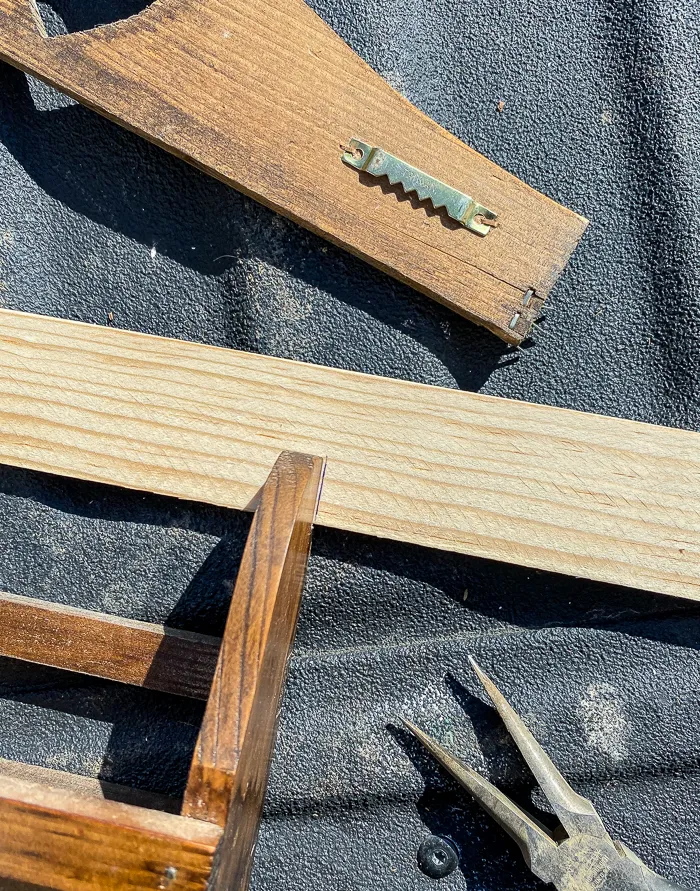
Displaying Your Mason Jar Creations
While a simple mason jar on a windowsill is perfectly lovely, once you have a collection of successful propagations, you might want to show them off! The original idea of creating a dedicated “propagation station” is a fun way to turn your rooting projects into decor. Whether you arrange several jars on a tiered stand, hang them in macrame holders, or get creative with a DIY project like the wood arch mentioned in the original post (adapted to hold jars or display rooted cuttings), there are many ways to integrate your propagation hobby into your home’s aesthetic.
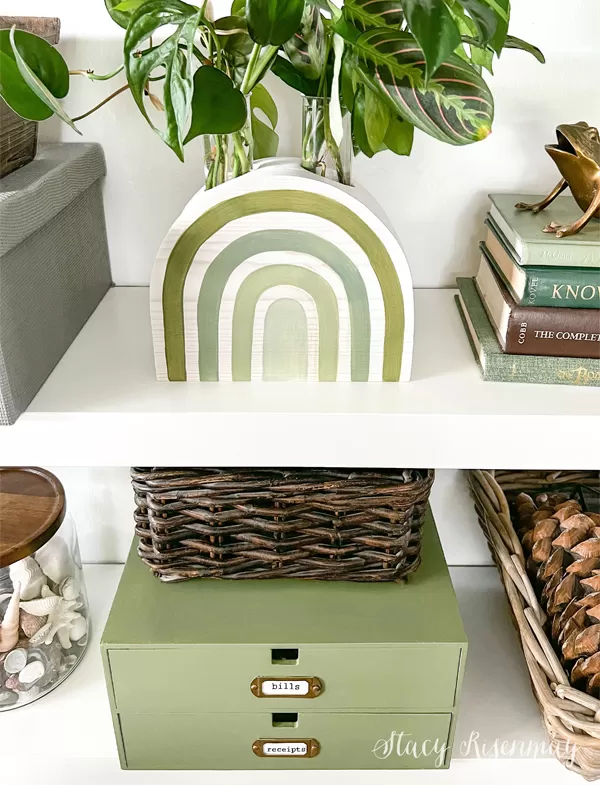 Finished DIY wooden arch painted with stripes, holding glass test tubes with plant cuttings
Conclusion
Propagation in mason jars is an accessible, affordable, and incredibly rewarding way to expand your plant collection. It’s a simple process that allows you to get hands-on with your plants and witness the miracle of growth firsthand. So grab a cutting, fill a jar with water, and start your propagation journey today! You’ll have new plant babies before you know it.
What are your favorite plants to propagate in mason jars? Share your experiences and tips in the comments below!