Categories: Propagating plants

Clone Your Favorites: A Beginner’s Guide to Setting Up a Home Micropropagation Lab

  • Learn the magic of multiplying plants from tiny pieces.
  • Discover the essential tools and techniques for sterile work.
  • Set up a dedicated space in your home for plant cloning.
  • Overcome common challenges like contamination.
  • Expand your plant collection or preserve special varieties.

Ever dreamed of having an endless supply of your favorite rare orchid, that special houseplant you can’t find anywhere, or cloning a prize-winning perennial? Micropropagation, often called plant tissue culture, is a fascinating technique that lets you do just that, right from your own home! It sounds like something out of a science lab, but with a little patience and the right guidance, setting up a home micropropagation lab is an achievable goal for any dedicated gardener. This guide will walk you through the exciting process, turning your home into a hub for plant multiplication and preservation.

Understanding the Power of Micropropagation

At its heart, micropropagation is about taking a tiny piece of a plant – maybe a shoot tip, a node, or even just a leaf segment – and growing it into a whole new plant in a sterile environment. This is possible thanks to an incredible natural ability found in most plant cells called totipotency. It means a single plant cell holds all the genetic information needed to regenerate an entire organism!

For the home gardener, this opens up a world of possibilities beyond traditional cuttings or seeds:

  • Rapid Multiplication: Produce many plants from a single parent plant quickly.
  • Cloning Success: Create genetically identical copies of your prized plants.
  • Propagating Difficult Plants: Multiply species that are hard to grow from cuttings or seeds.
  • Disease-Free Starts: Begin with clean plant material, reducing the risk of pests and diseases.
  • Space Efficiency: Grow many plants in a small space during the initial stages.

Is a Home Lab Right For You? Managing Expectations

While incredibly rewarding, setting up a home micropropagation lab requires commitment. It’s not just about having the right equipment; it’s about developing meticulous habits and understanding the delicate balance required for success. It’s best suited for hobbyists passionate about plant science and propagation, not necessarily for large-scale commercial ventures initially.

Common Hurdles to Be Prepared For

Every micropropagation journey faces challenges. Knowing them upfront helps you stay prepared and persistent:

  • Contamination: This is the biggest challenge. Airborne fungi, bacteria, or even microbes from your hands can ruin cultures quickly. Maintaining a sterile environment is paramount.
  • Explant Survival: Not all tiny plant pieces will survive and grow. Sterilization might be too harsh, or the media might not be quite right for that specific plant.
  • Browning: Sometimes, cut plant tissues release compounds that turn the media brown, inhibiting growth.
  • Vitrification: Plantlets can sometimes look glassy or waterlogged due to media or environmental issues.
  • Acclimatization Shock: Moving plants from the sterile, humid jar environment to the real world can be tricky and requires a careful transition.

Don’t let these potential issues discourage you! They are part of the learning process, and overcoming them is part of the satisfaction.

Essential Ingredients for Your Home Micropropagation Lab

Think of these as the core pillars your lab will be built upon:

Explants: The Tiny Starters

These are the small pieces of plant tissue you’ll use to start your cultures. Shoot tips, nodes (where a leaf joins the stem), or even small leaf sections are common choices. Choosing healthy, actively growing tissue is key.

Crafting Your Nutrient Brew: Culture Media

Plants in tissue culture don’t have soil; they get all their food and hormones from a special gel or liquid mix called the culture medium. This media contains macronutrients (like nitrogen, phosphorus, potassium), micronutrients (trace elements), vitamins, sugar (plants can’t photosynthesize effectively in the jar), and often plant hormones (like auxins and cytokinins) to encourage root and shoot growth. Agar is typically used to solidify the liquid into a gel.

The Invisible Shield: Aseptic Techniques

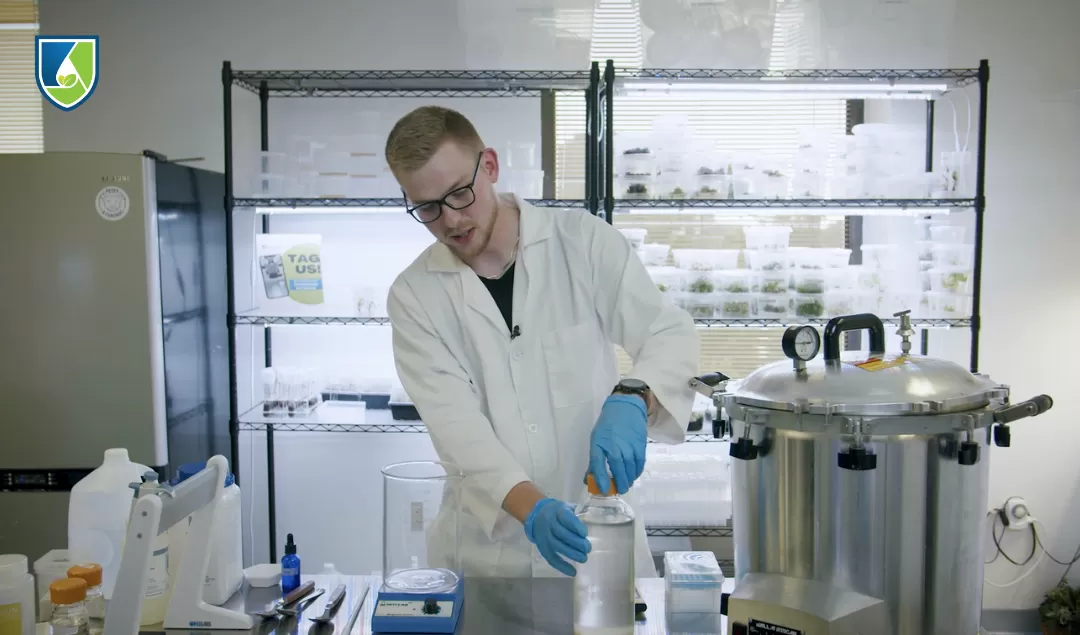
This is the practice of keeping everything sterile – your workspace, your tools, the plant material, and the media – to prevent contamination from microbes. It involves careful cleaning, sterilizing equipment, and working in a still, clean environment.

Creating the Perfect Grow Room: Controlled Environment

Your little plantlets in jars need specific conditions to thrive: consistent temperature, appropriate light intensity and duration, and protection from drafts or extreme changes. An incubation area provides these conditions.

Gathering Your Toolkit: What You Need

You don’t need a million-dollar laboratory, but you will need some dedicated equipment and supplies.

Must-Have Equipment

  • Sterile Workspace: This is critical. An ideal setup is a laminar flow hood (expensive!), but a simple still air box built from a clear plastic bin or a meticulously cleaned area in a draft-free room can work for hobbyists.
  • Sharp Cutting Tools: A sterile scalpel or fresh razor blades are needed for making precise cuts on explants.
  • Forceps: Essential for handling tiny explants and transferring them without touching them. You’ll need straight and maybe curved ones.
  • Sterile Containers: Glass jars with lids (like canning jars) or lab-grade tissue culture vessels are needed to hold the media and explants. They must be able to withstand sterilization.
  • Sterilization Method: You need a way to sterilize your media and containers. A lab autoclave is standard, but a pressure cooker with a pressure gauge is a common and effective home alternative.
  • Measuring Tools: Graduated cylinders and pipettes for accurately measuring liquids when preparing media.
  • pH Meter or pH Test Strips: To ensure your culture media has the correct acidity level, which is crucial for nutrient uptake.

Person working inside a laminar flow hood or clean bench during plant tissue culture transfer.

Supplies You’ll Need

  • Culture Media Ingredients: You can purchase pre-made media mixes (like MS media, a common one) or buy individual components like agar, salts, vitamins, and hormones to mix your own.
  • Disinfectants: Bleach (sodium hypochlorite) and ethanol (rubbing alcohol) are used for surface sterilization of the workspace, tools, and sometimes the explants.
  • Distilled Water: Essential for preparing media and solutions, free from impurities found in tap water.
  • Parafilm or Plastic Wrap: To seal the culture vessels and prevent contamination while allowing some gas exchange.

Steps to Setting Up Your Micropropagation Space

  1. Choose and Prepare Your Workspace: Select a quiet, draft-free area. Dedicate a table or counter strictly for tissue culture work. Clean it thoroughly with disinfectant before each session. If using a still air box, clean that equally well.
  2. Gather and Sterilize Tools & Containers: Arrange your tools, containers, and media components. Sterilize your jars/vessels and tools using your pressure cooker or autoclave according to recommended times and pressures.
  3. Prepare Your Culture Media: Accurately measure and mix your media components with distilled water. Adjust the pH. If using agar, heat gently to dissolve. Pour the media into your sterile containers before sterilization (if using a pressure cooker for media sterilization).
  4. Sterilize the Media: Sterilize the media-filled containers in your pressure cooker.
  5. Prepare Explants (Sterilization): Carefully select healthy plant material. This is often done just before you are ready to work in the sterile area. Surface sterilize your chosen explant material using dilute bleach or other sterilants, followed by rinses in sterile water.
  6. Work in the Sterile Area: Inside your sterile box or hood, use sterile tools to cut the surface-sterilized plant material into small explants.
  7. Aseptic Transfer: Using sterile forceps, quickly and carefully transfer the explants into the sterile containers filled with cooled, solidified culture media. Seal the containers immediately.
  8. Incubation: Place the sealed containers in your incubation area under appropriate light and temperature conditions.

Rows of tissue culture jars containing small green plantlets under grow lights in an incubation rack.

Bringing Your Plantlets Home: Acclimatization

After weeks or months growing happily in their sterile jars, your plantlets will need to transition to the outside world. This process, acclimatization, is crucial. Gradually expose them to lower humidity and non-sterile conditions, often starting by opening the jars slightly over several days, then transplanting into a sterile, humid potting mix under a humidity dome, slowly reducing humidity over time.

Troubleshooting: When Things Go Wrong

Expect setbacks! Contamination is the most common issue. If you see fuzzy mold or cloudy liquid, that container is contaminated and should be removed immediately to prevent spread. Review your sterilization techniques and workspace cleanliness. If explants die, consider if sterilization was too harsh or if the media composition needs tweaking for that specific plant. Keep detailed notes of what you did – successes and failures are both valuable learning experiences.

Ready to Start Your Home Micropropagation Adventure?

Setting up a home micropropagation lab is a journey of discovery, merging your love for plants with scientific curiosity. It allows you to peek behind the curtain of plant growth and actively participate in creating new life. While it demands careful work and patience, the reward of watching tiny tissues develop into full-fledged plants in a jar is truly magical.

Are you excited to give it a try? Have you experimented with tissue culture before? Share your thoughts and experiences in the comments below! Don’t forget to share this guide with fellow plant enthusiasts who might be curious about cloning plants at home.

Clare

I'm Clare Nguyen, a full-time blogger who's all about exploring and sharing fresh ideas. I've got this inexplicable love for plants that adds so much joy to life. Investing in some green goodness at home is my favorite hobby. Now, I may not be an expert plant-whisperer, but I'm always excited to share any new insights and legit knowledge that I've gathered along the way. My goal is to inspire and connect with others who feel the same way!

Recent Posts

Gemischten Blattsalat anbauen: So gelingt Frische aus dem Garten

Wichtigste Erkenntnisse: Der Anbau eigener gemischter Blattsalate bietet unübertroffene Frische und Geschmack – direkt aus…

2 months ago

Unlock Thriving Container Gardens: Implementing No-Dig Techniques for Ultimate Soil Health

Here's how implementing no-dig techniques can transform your container gardening: Build Richer Soil: Layers of…

2 months ago

Unlock Your Garden’s Natural Defense: The Power of Natural Disease Suppression

Healthy soil is teeming with beneficial microbes that act as a natural defense system for…

2 months ago

Building Modern Meadow Container Gardens for Naturalistic Summer Patios

Transform your patio into a vibrant, wildlife-friendly oasis. Discover how to create beautiful, low-maintenance container…

2 months ago

Sedum & Yarrow Blends: The Dynamic Duo for a Thriving, Low-Maintenance Garden

Unlock the secret to a beautiful, resilient garden with Sedum & Yarrow blends. Discover why…

2 months ago

Selecting and Caring for Drought-Tolerant Container Perennials in Summer

Beat the Heat: Discover resilient perennials that thrive in containers during the hottest summer months,…

2 months ago