- Transform old items into stylish plant propagation displays.
- Easily root new plants from cuttings in water.
- Add a touch of vintage charm to your home decor.
- An affordable and satisfying summer DIY project.
Summer is the perfect time to expand your green family! Propagation, the art of creating new plants from existing ones, is one of the most rewarding aspects of gardening. While a simple glass of water works, why not make the process a beautiful display? This summer, let’s dive into the world of setting up beautiful propagation stations at home. Instead of cluttering countertops with random jars, we can create dedicated, stylish spots that showcase your growing plant collection. It’s easier than you think, often requiring just a bit of creativity and perhaps a forgotten item waiting for a new life.
Contents
- Why Build Your Own Propagation Station?
- What You’ll Need for This Project
- Your Step-by-Step Guide to a Stylish Propagation Station
- Finding Your Base: The Spice Rack Hunt
- Giving It a Makeover: Removing Old Details
- Fresh Wood for a New Look
- Building It Back Stronger
- Smooth Operator: Prepping the Surface
- A Splash of Color
- Jars with Character: Adding Vintage Charm
- Conclusion
Why Build Your Own Propagation Station?
Propagation stations aren’t just functional; they are living pieces of art. They allow you to watch roots develop, a fascinating process in itself. Having a dedicated station keeps your propagation efforts organized and prevents delicate cuttings from being knocked over. Plus, a beautifully designed station enhances your indoor garden aesthetic, turning plant propagation into a decorative element. Building your own, especially by upcycling items, adds a unique, personal touch that store-bought versions can’t match.
What You’ll Need for This Project
Ready to transform a simple item into a stunning plant display? For this particular station, we’re giving a dated wooden spice rack a chic new purpose. Here’s a list of the materials that can help you achieve a similar look:
- An old wooden spice rack (check thrift stores!)
- Scrap wood (a small piece, like 1/4″ x 1 3/8″ lattice, works well)
- Tools for dismantling (pliers, screwdriver, rubber mallet might be needed)
- Wood glue
- Saw for cutting wood (a miter saw or even a hand saw with a miter box)
- Drill and small drill bit
- Small nails or screws
- Sander and medium-grit sandpaper (around 150-grit)
- Cleaner (like Simple Green) and paper towels
- Paint suitable for wood (choose a color that fits your style)
- Paintbrush
- Glass jars that fit your spice rack (old spice jars, small bottles, or test tubes)
- Decorative labels (vintage-inspired labels add character)
- Mod Podge (or other craft adhesive/sealant)
Your Step-by-Step Guide to a Stylish Propagation Station
Let’s walk through how to take a humble spice rack and turn it into the perfect spot for setting up beautiful propagation stations at home this summer. This process involves a bit of deconstruction and reconstruction, but it’s very beginner-friendly.
Finding Your Base: The Spice Rack Hunt
Your journey begins with finding the right piece. Look for an old wooden spice rack at local thrift stores, garage sales, or flea markets. Don’t worry about its current look or any outdated details – that’s exactly what we’re going to change! The important thing is the basic structure.
Finding vintage spice racks for a DIY propagation project.
Giving It a Makeover: Removing Old Details
Many older spice racks have decorative elements that might not fit a modern or specific vintage aesthetic. My rack, for instance, had a heart cut-out at the top. Assess your find and decide what elements you’d like to remove. The method will depend on how the rack is assembled (staples, nails, glue). Pliers and a rubber mallet are often useful for gently detaching unwanted pieces without damaging the main structure.
 removing dated parts of spice rack
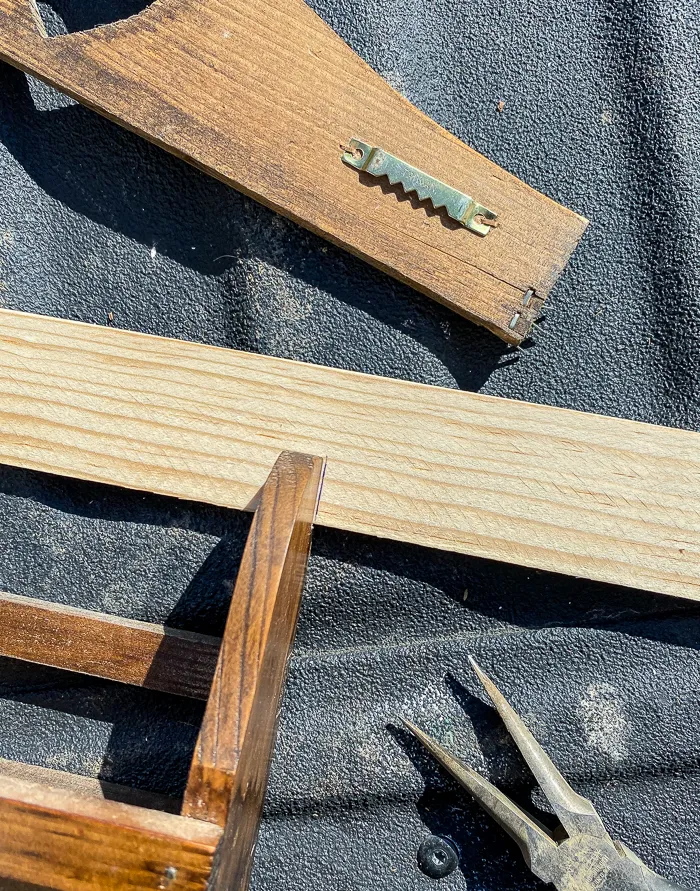
Fresh Wood for a New Look
Once dated details are gone, you might need to replace a piece or two to create a clean, updated look. Using a scrap piece of wood that fits the dimension, measure and cut it to size. This new piece will fill the gap left by the removed element and provide a fresh canvas.
 cutting new wood for spice rack
Building It Back Stronger
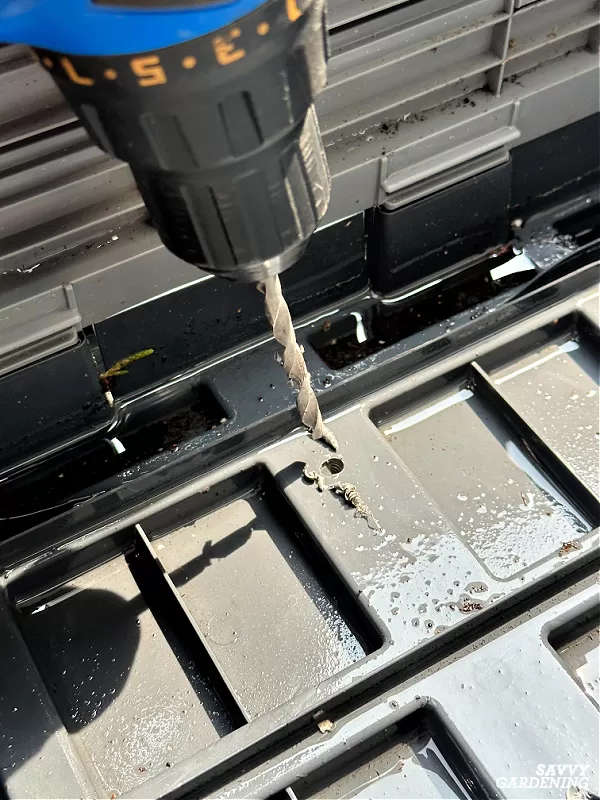
Attach your new piece of wood using wood glue. Hold it firmly or use clamps while the glue sets slightly. For extra durability, reinforce the connection with small nails or screws. If you’re not using a nail gun, pre-drilling a small pilot hole with your drill can prevent the wood from splitting.
 attaching new wood to spice rack
 drilling holes to attach wood
Smooth Operator: Prepping the Surface
With the structure updated, it’s time to get it ready for finishing. Give the entire spice rack a thorough sanding using medium-grit sandpaper (like 150 grit). Pay attention to any rough edges, corners, or areas where you made modifications. Sanding creates a smooth surface for painting and gives your finished piece a professional look. After sanding, wipe the rack clean to remove all dust.
Sanding the wooden propagation station frame for a smooth finish before painting.
A Splash of Color
Now for the fun part – painting! Choose a paint color that complements your home decor style. A dark, sophisticated color can give a dated piece a modern or vintage-inspired update, while a bright color can make it a cheerful focal point. Apply two coats for good coverage, allowing the first coat to dry completely before applying the second.
 painting wood spice rack
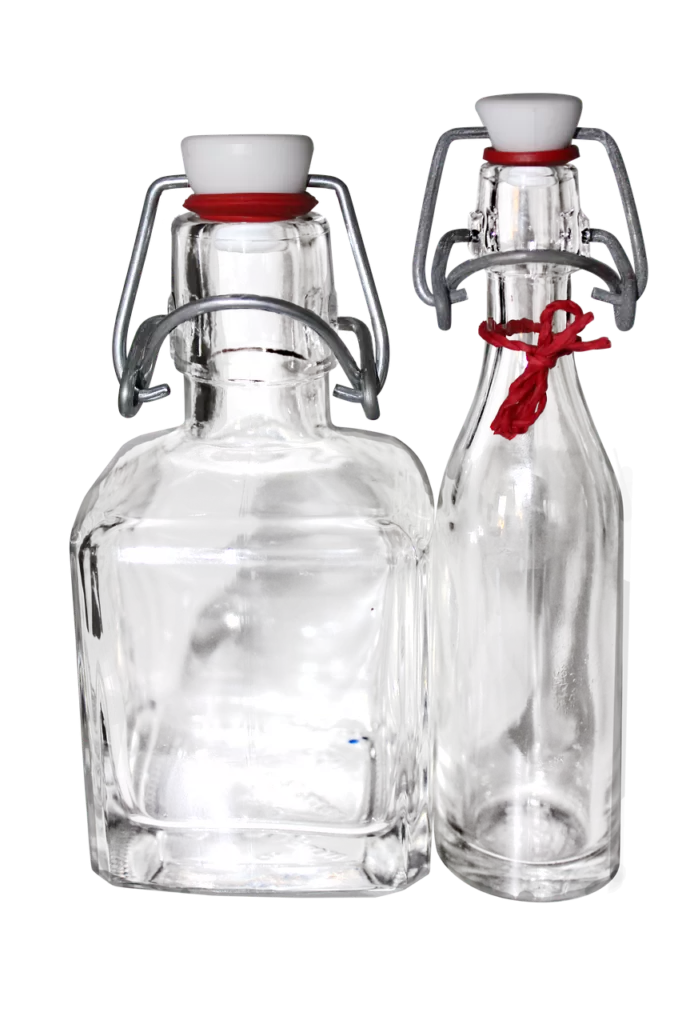
Jars with Character: Adding Vintage Charm
While any small glass jars or bottles will work, adding a decorative touch can elevate your propagation station. Consider using vintage-inspired labels, like old apothecary or pharmacy designs. You can find printable versions online. Print them on sturdy paper, cut them out, and attach them to your jars using Mod Podge. This adds a unique, charming detail.
 vintage medical labels
Using Mod Podge to adhere decorative labels onto small glass bottles for plant cuttings.
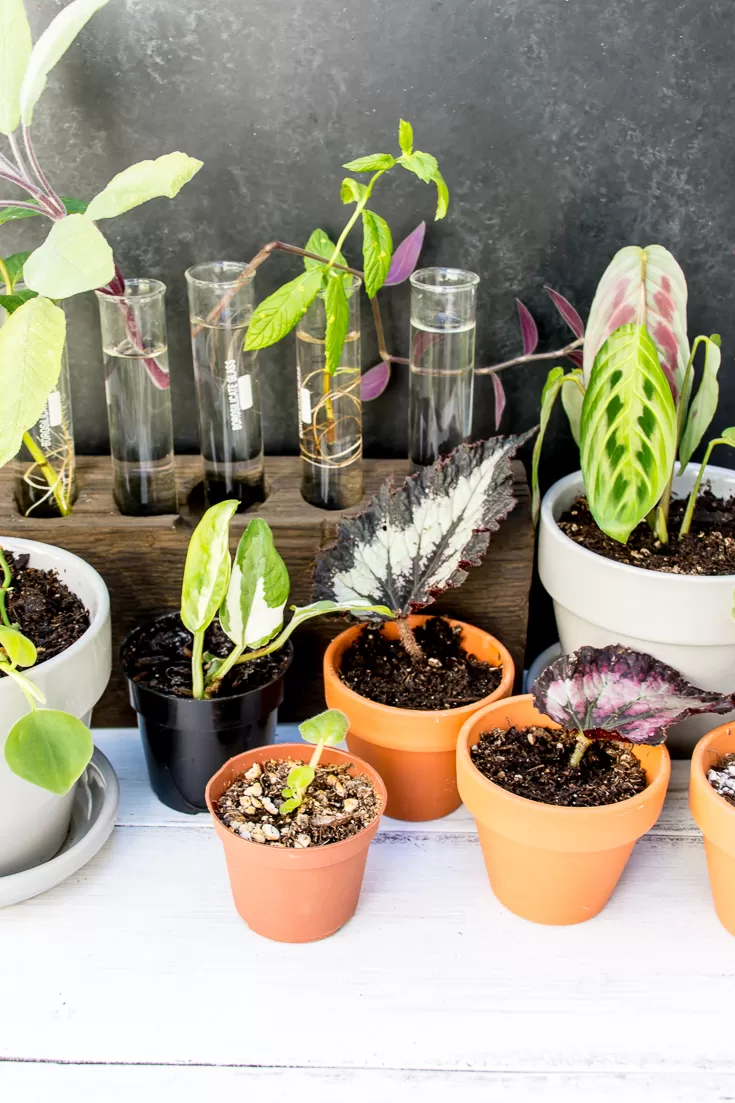
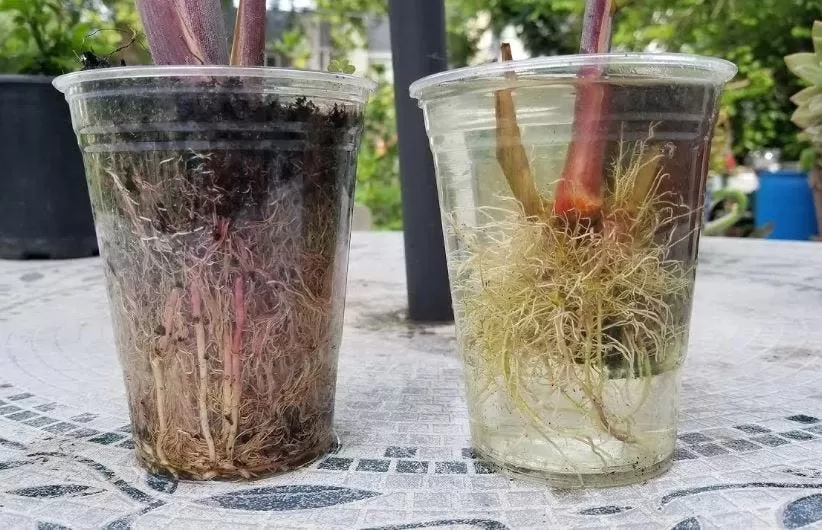
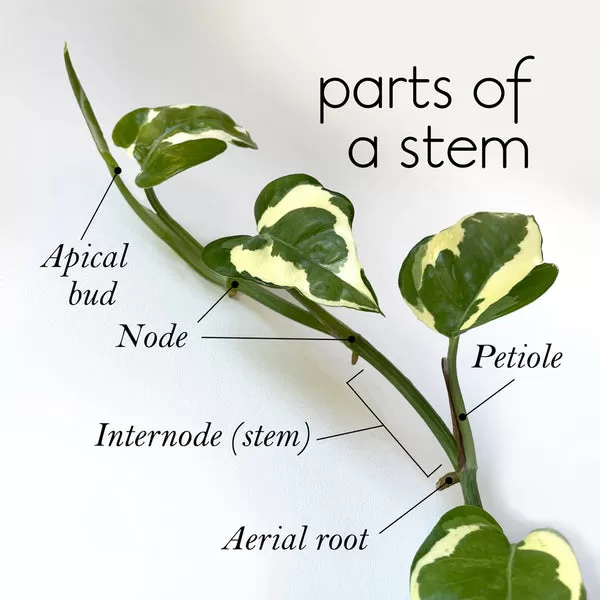
Fill the jars with water and add your plant cuttings! Pothos are a fantastic choice for water propagation, rooting easily and reliably. Simply snip a section below a node (where a leaf attaches to the stem) and place it in water, ensuring the node is submerged.
- Pothos (Epipremnum aureum)
- Common Names: Golden Pothos, Devil’s Ivy
- Zone: 10-11 (often grown indoors everywhere)
- Light: Low to bright indirect light
- Humidity: Tolerates average indoor humidity, prefers higher
- Water: Keep soil consistently moist when potted; roots easily in water
Other great candidates for water propagation include Philodendron, Spider Plants, Snake Plants, and some herbs like Rosemary or Mint. Place your newly filled jars back into the rack shelves.
A collection of plant cuttings in water-filled jars on a newly created propagation station.
 spice rack turned propagation station
 spice rack turned propagation station
 how to turn a spice rack into a propagation station
Conclusion
Setting up beautiful propagation stations at home this summer doesn’t have to be complicated or expensive. As this spice rack transformation shows, creativity and a little elbow grease can turn overlooked items into functional and attractive pieces for your indoor garden. It’s a rewarding project that not only provides a dedicated space for your plant cuttings but also adds unique charm to your home.
What old items do you have lying around that could be upcycled into something new? Share your ideas in the comments below! If you enjoyed this DIY project, please share it with your fellow plant lovers. Explore more gardening tips and creative projects right here on Thelittle.garden!