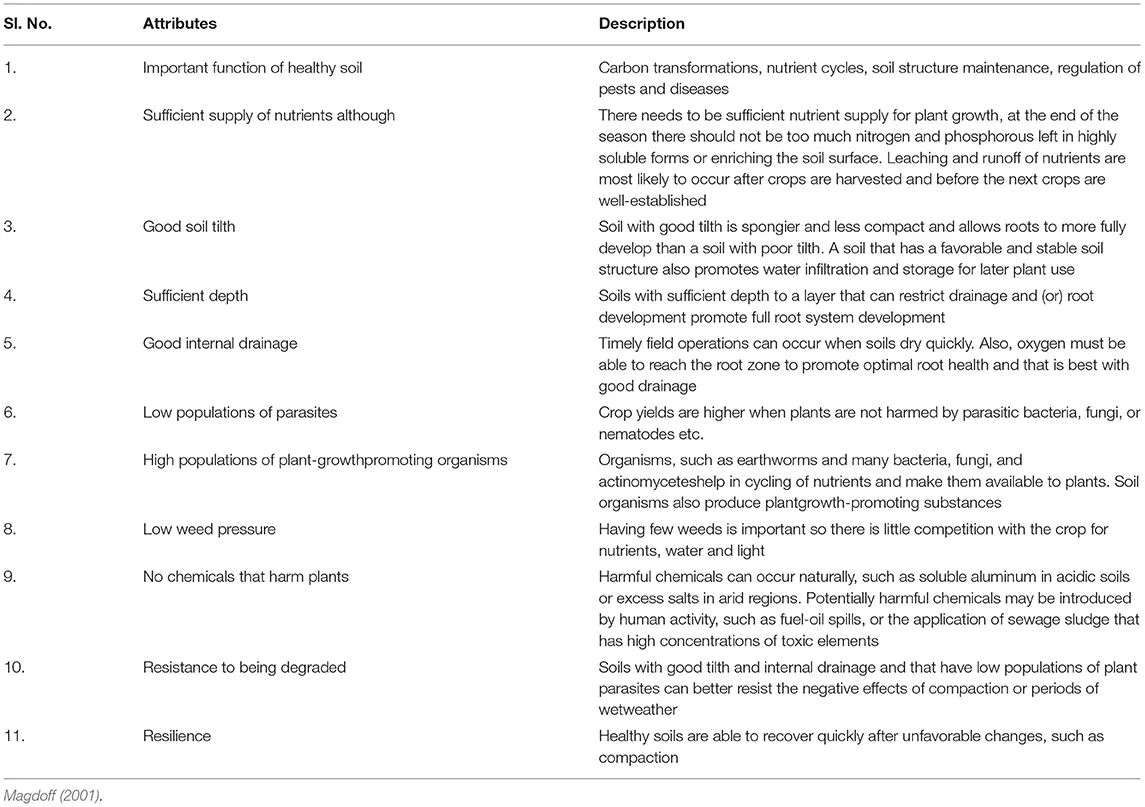
- Discover the secrets to perfectly dried garlic, maximizing its shelf life and pungent flavor.
- Learn the optimal time to harvest your garlic for peak quality.
- Master the step-by-step process of curing garlic for long-term storage.
- Explore tips and techniques for preserving your homegrown garlic harvest.
Drying garlic after harvesting is a crucial step that transforms your freshly dug bulbs into pantry staples. Proper drying, also known as curing, not only extends the shelf life of your garlic but also intensifies its flavor. This guide will walk you through how to dry garlic after harvesting, ensuring you enjoy its pungent goodness for months to come.
When is Garlic Ready for Harvest?
Knowing the right time to harvest your garlic is the first step towards successful drying and storage. Look for these tell-tale signs:
- Yellowing and Browning Leaves: Around late June or early July (depending on your climate), the lower leaves of the garlic plant will begin to yellow and brown.
- Three-ish Brown Leaves: When approximately three lower leaves have turned brown, it’s prime harvesting time.
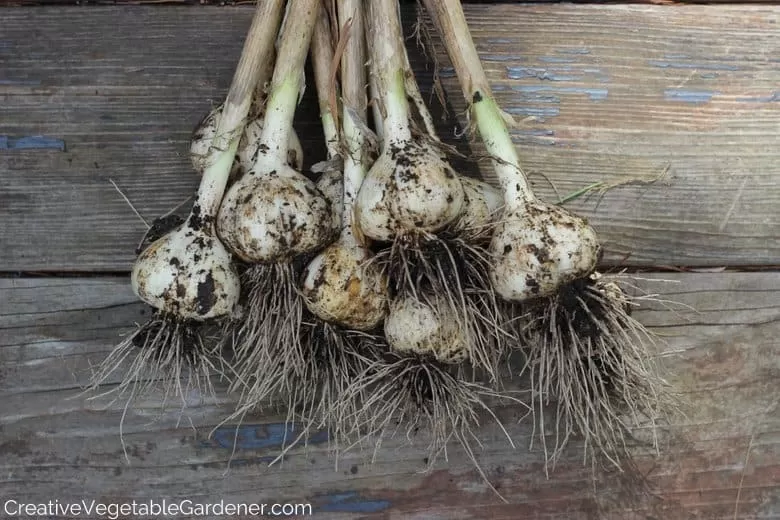
 Garlic ready to harvest
Harvesting Your Garlic: A Step-by-Step Guide
- Loosen the Soil: Avoid pulling garlic directly from the ground, as this can break the stalk and leave the bulb behind. Use a garden fork to gently loosen the soil around the bulbs.
- Gentle Removal: Once loosened, carefully lift the garlic plants from the soil, keeping the foliage intact.
 Harvesting Garlic
- Sort and Separate: If you’re growing multiple garlic varieties, keep them separate for easier evaluation of taste, storage life, and spiciness.
- Select Seed Garlic: Set aside the largest and healthiest bulbs from each variety for next year’s planting. Label them clearly.
How to Dry Garlic: The Curing Process
- Ideal Curing Location: Choose a dark, dry, and well-ventilated area like a covered porch, garage, or shed.
- Hanging Method: Bundle garlic plants together in groups of about 10, using garden twine. Leave a long piece of twine for hanging.
 hanging garlic to dry
- Labeling (Optional): Use flagging tape to label each bundle with the variety name, especially if saving for seed.
- Hanging the Bundles: Hang the garlic bundles from rafters, hooks, or a drying rack, ensuring good air circulation around them.
Curing Garlic
- Curing Time: Allow the garlic to cure for 6-8 weeks. The “paper” around the cloves should dry completely, resembling store-bought garlic.
- Final Preparation: Once cured, trim the roots and stalks using pruning shears. Store the bulbs in a cool, dry place that doesn’t freeze, ideally between 33-38°F.
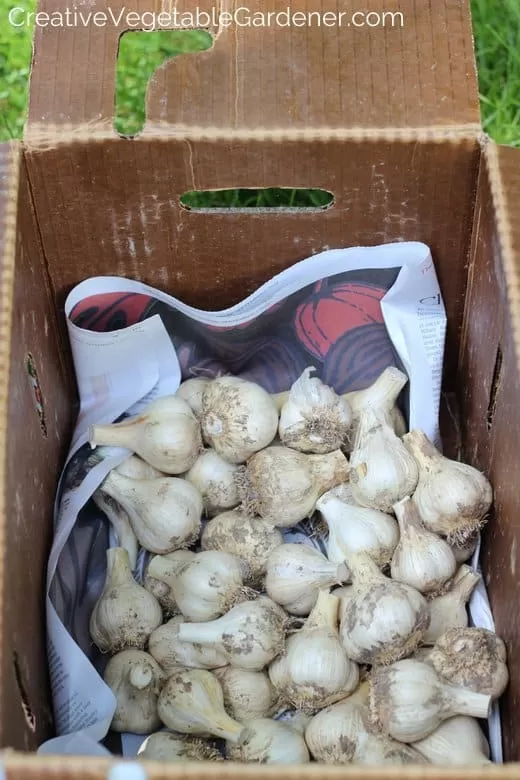 Storing Garlic
Enjoying Your Dried Garlic
Your perfectly cured garlic is now ready to elevate your culinary creations. Its enhanced flavor will add depth and complexity to countless dishes. Properly dried garlic can last for several months, allowing you to savor the taste of your homegrown harvest throughout the year.
Conclusion
Drying garlic after harvesting is a simple yet essential process that ensures maximum flavor and longevity. By following these steps, you can enjoy the rewards of your gardening efforts for months to come. Share your own garlic drying tips in the comments below!