Finding a forgotten head of garlic in your pantry that’s started to sprout can feel a little disappointing. Maybe you feel like you’ve wasted it, or you’re unsure if it’s still good. But what if I told you those green little sprouts are actually a sign of potential, a promise of a whole new garlic harvest right in your garden?
- Discover how easy it is to turn sprouted pantry garlic into thriving plants.
- Learn the simple steps for preparing and planting garlic cloves with sprouts.
- Understand the difference between eating sprouted garlic and growing it.
- Get tips on caring for your spring-planted garlic until harvest time.
- Find out when and how to harvest your homegrown garlic bulbs.
Growing garlic from sprouted cloves is a wonderfully rewarding way to reduce waste and add fresh, pungent flavor to your kitchen later in the year. It’s a simple process that proves you don’t need perfectly manicured bulbs to start your garlic-growing journey. Let’s dig in and find out how to grow garlic sprouts!
The Magic of Sprouted Garlic: Can You Grow It?
Absolutely! That little green shoot pushing its way out of a garlic clove is simply the plant doing what it’s naturally meant to do – start growing. Pantry conditions might not be ideal, but the sprout is ready to seek light and nutrients. Planting these sprouted cloves is a fantastic way to give them the chance to fulfill their potential.
Each individual clove, when planted, has the capacity to grow into a brand new, full head of garlic. Think of it as propagating garlic – taking one clove and turning it into a whole bulb with many cloves! It’s gardening magic powered by nature’s own design.
The best time to plant sprouted garlic outdoors depends on your climate. If your soil isn’t frozen, you can likely plant them directly outside in the spring or even late winter in warmer regions. If winter still has a grip, no worries – you can start them indoors in a pot!
Eating vs. Planting: What to Do with Sprouted Garlic
So, you’ve found garlic with sprouts. Is it still edible? Yes, it is! Sprouted garlic is perfectly safe to eat. However, you might notice a difference in flavor compared to fresh or fully cured garlic. The sprout itself has a milder, greener taste, almost like a chive or mild green onion. The clove itself can also become less potent.
Once garlic starts sprouting, its energy is being redirected into growing the plant, not maintaining the bulb’s storage life. This means sprouted garlic won’t keep for much longer in the pantry. If you don’t plan to use that whole bulb in your cooking right away, planting the cloves is often the best option. It gives them a purpose and promises a future harvest!
Getting Started: Preparing Your Sprouted Garlic for Planting
Preparing sprouted garlic for planting is straightforward and only takes a moment.
- Separate the cloves: Gently break apart the entire bulb into individual cloves. The papery outer layers can be peeled back just enough to make this easy. Don’t worry about getting every bit of paper off each clove – a little is fine.
- Keep the peel on the clove: You don’t need to peel the individual cloves like you would for cooking. The peel helps protect the growing clove in the soil.
- Protect the sprout: Handle the cloves carefully to avoid damaging the green sprout.
Why separate the cloves? If you plant the whole bulb without breaking it apart, all the cloves will try to grow right next to each other. They’ll compete for space and nutrients, resulting in stunted growth and small, poorly formed bulbs all clumped together. Planting individual cloves gives each one the room it needs to develop into a healthy, full-sized head.
(If the sprout is yellow or white because the garlic has been stored in the dark, that’s completely normal! It will quickly turn bright green once it’s exposed to sunlight after planting.)
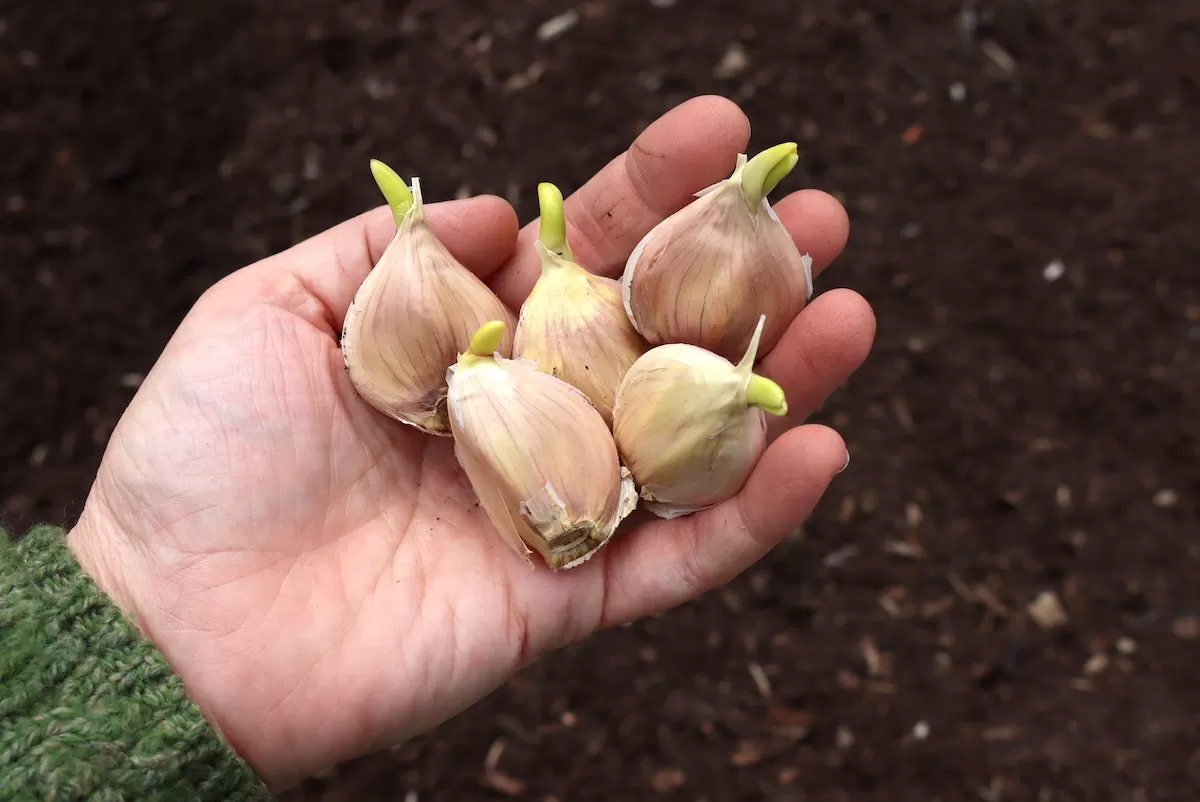 Sprouted garlic broken apart into individual cloves for planting
Step-by-Step Guide: How to Grow Garlic Sprouts in the Garden (or a Pot!)
Once your sprouted cloves are prepped, it’s planting time!
How to Plant Sprouted Garlic
Choosing the right spot and preparing the soil is key to success when growing garlic sprouts.
- Choose a Location: Garlic loves sunshine! Pick a spot that gets at least 6-8 hours of direct sunlight per day.
- Prepare the Soil: Garlic thrives in rich, well-drained soil. Amend your planting bed with plenty of compost or well-rotted manure. This “heavy feeder” appreciates the extra nutrients. Make sure the soil is loose and free of weeds.
- Plant the Cloves: Plant each individual sprouted clove with the pointed, sprouted end facing upwards.
- Depth and Spacing: A general rule of thumb is to plant cloves about 6 inches (15 cm) apart. Cover the top of the clove with about 1 to 2 inches (2.5-5 cm) of soil. This means the base of the clove will be roughly 3 to 4 inches (7.5-10 cm) deep depending on its size.
- Mulch: Adding a layer of mulch, like straw or shredded leaves, is highly recommended, especially for spring planting. Mulch helps retain soil moisture, keeps the soil cooler (which garlic prefers as temperatures rise), and suppresses weeds, reducing competition for your young garlic plants.
 Our garlic is mulched with straw in raised beds. This is fall-planted garlic as it's sprouted in the spring, but I'm trying to show how it's mulched heavily with straw to regulate soil temperature and suppress weeds.
Planting Indoors (If Soil is Frozen)
If you find sprouted garlic during the cold winter months when outdoor planting isn’t possible, simply plant the cloves in a pot filled with potting mix. Use a pot that’s deep enough to accommodate the clove and cover it with a couple of inches of soil. Place the pot on a sunny windowsill and water it regularly until outdoor conditions improve. You can then transplant the sprouts into the garden once the soil is workable and the weather is mild.
Caring for Your Growing Garlic Sprouts
Once your sprouted garlic cloves are nestled in the soil, they’ll focus on developing a strong root system before putting on significant top growth.
- Watering: Keep the soil consistently moist, especially during dry periods, but avoid waterlogging. Garlic doesn’t like sitting in soggy soil.
- Weeding: Keep the area around your garlic plants free of weeds. Weeds compete for water, nutrients, and light, which can significantly reduce your garlic harvest. Mulch helps a lot with this!
- Feeding: As mentioned, garlic is a heavy feeder. If your soil wasn’t initially rich, you might consider a light feeding with a balanced, slow-release fertilizer a few weeks after planting.
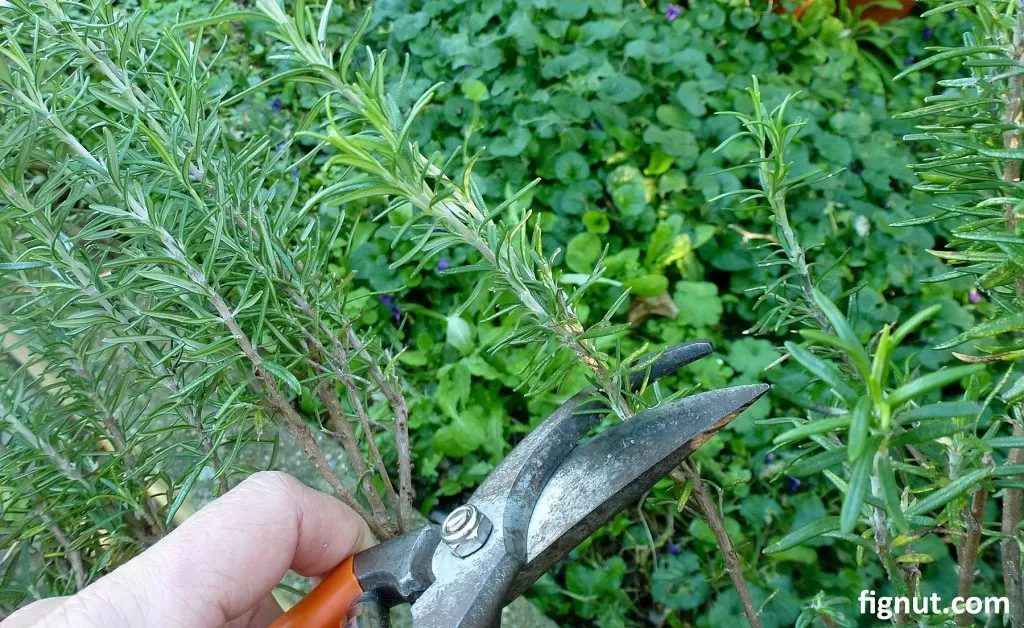
- Garlic Scapes (for Hardneck Varieties): If you’re growing a hardneck variety of garlic (common in colder climates; softneck varieties typically sold in grocery stores don’t produce scapes), you’ll notice a curly stem emerging from the center of the plant in late spring or early summer. This is the garlic scape, which would eventually form a flower and bulbils. For bigger garlic bulbs underground, it’s best to snip off the scape as soon as it forms. Don’t discard them – garlic scapes are delicious! Use them in pesto, stir-fries, or roasted. Removing the scape redirects the plant’s energy into developing a larger bulb rather than producing seeds.
 The garlic on the left had its scape removed as soon as it formed. The bulb on the right had a scape that was allowed to form and fully flower, meaning that some of the energy didn’t go into bulb development.
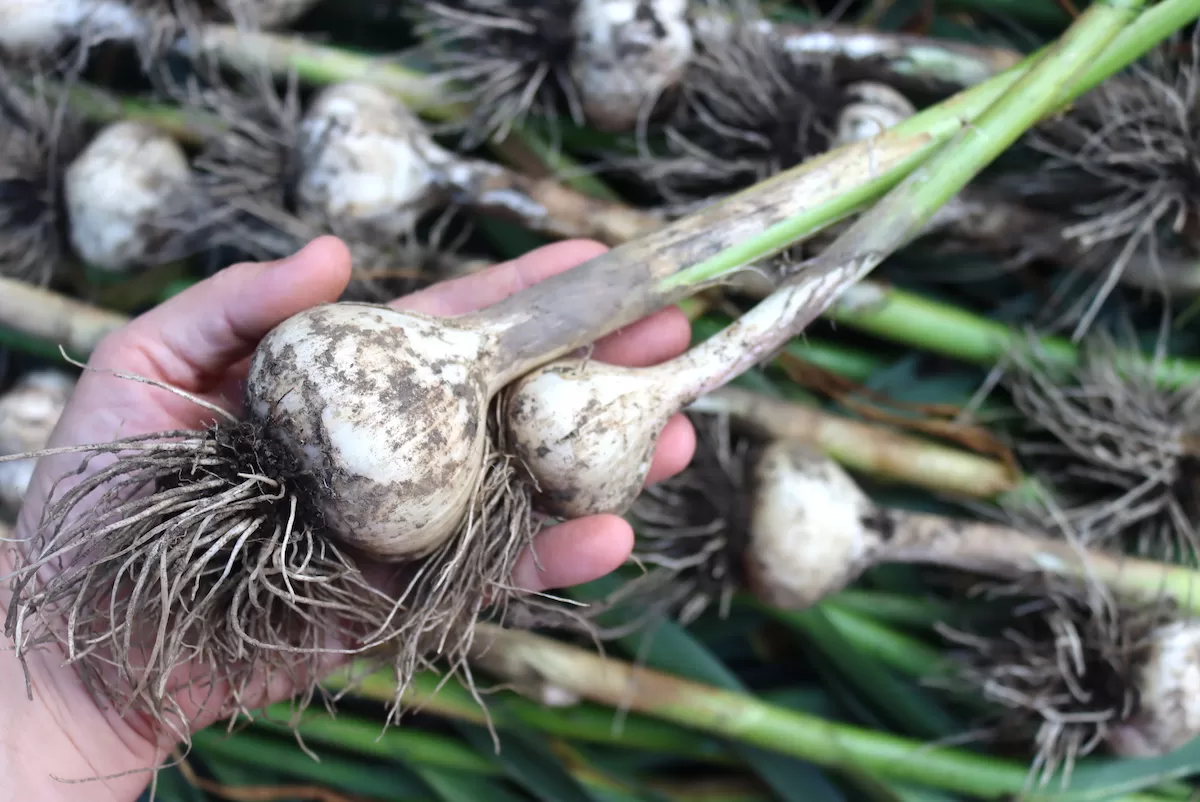
When to Harvest Your Sprouted Garlic Bulbs
Timing the harvest is important for getting well-formed bulbs that will store well. Look for these signs, typically appearing in late summer (July or August in many climates):
- Yellowing Leaves: The most reliable indicator is when the bottom two or three pairs of leaves on the plant begin to yellow and dry out.
- Still Green Tops: The upper leaves should still be mostly green. If all the leaves have turned brown, you’ve likely waited too long.
If you’re unsure, you can gently dig around the base of one plant to check on the bulb’s development. It should look well-formed and feel firm and tight.
Harvesting too late can cause the bulb to start separating into individual cloves while still in the ground. While still edible, these separated bulbs won’t store as long as those harvested at the right time. Harvest them first and use them relatively quickly.
To harvest, gently loosen the soil around the bulb with a trowel or fork, then pull the plant up by the stem. Avoid pulling too hard if the soil is compacted, as you could break the stem from the bulb.
 A fully formed garlic bulb at harvest time
Spring Planted vs. Fall Planted Garlic: The Head Start Advantage
You might wonder why many gardeners recommend planting garlic in the fall. The main reason is to give the cloves a critical head start. Planted in autumn, about 4-6 weeks before the ground freezes, garlic cloves focus on developing robust root systems throughout the fall. They then go dormant during the cold winter. As soon as the soil warms in spring, these well-rooted plants are ready to rocket upwards, putting on vigorous leafy growth early in the season.
Spring-planted garlic, including those grown from sprouts, misses this fall rooting phase. While they will catch up quickly in the warmer spring soil, they start the season without that extensive root network already established.
This difference can sometimes result in spring-planted bulbs being slightly smaller than their fall-planted counterparts, or maturing a week or two later. However, planting sprouted garlic in the spring is still a perfectly viable way to get a great garlic harvest the same year! Don’t let not planting in fall stop you from growing garlic if you have sprouts ready to go.
 This garlic clove was planted in the Autumn, about 6 weeks before the soil starts to freeze for the winter. Here’s what it looks like 6 weeks later, with well-established roots. While fall-planted garlic goes dormant all winter, it does establish itself before winter fully sets in. Spring planted garlic misses this early establishment step.
Curing Your Garlic Harvest for Storage
Freshly harvested garlic, often called “green garlic,” is milder and delicious, but it won’t last long on the counter. To store your homegrown garlic for months, you need to “cure” it. Curing is simply a drying process that hardens the outer layers of the bulb and stem, preparing it for long-term storage.
- Find a Spot: Choose a location that is shaded, dry, and has good air circulation. This could be a covered porch, a garage, a shed, or even indoors with a fan. Avoid direct sunlight, which can cook the bulbs.
- Lay or Hang: You can lay the garlic plants out in a single layer or tie them in bundles and hang them. Leaving the tops (stems and leaves) on during curing is helpful, as the plant will pull the last bit of energy and moisture from the leaves into the bulb, which helps it cure faster and better.
- Allow Time: Curing typically takes 2-4 weeks, depending on humidity and temperature. You’ll know it’s done when the stems and leaves are completely dried and brittle, and the outer wrappers of the bulb are dry and papery.
- Trim and Store: Once fully cured, trim off the roots and the dried stem (leaving about an inch or two). Brush off any loose dirt. Store the cured bulbs in a cool, dark, and dry place with good airflow. Mesh bags or open baskets work well.
If you live in a very humid climate where curing is difficult or storage is challenging, consider preserving your garlic in other ways, like making pickled garlic or fermented garlic honey.
And if, months down the road, you find one of your home-cured bulbs starting to sprout again… well, now you know exactly what to do! Either eat it fresh or plant it for yet another cycle of homegrown goodness.
Conclusion
Don’t let those sprouted garlic cloves go to waste! Learning how to grow garlic sprouts is a rewarding experience that extends the life of your pantry staples and brings the joy of harvesting your own garlic right to your table. It’s a simple process with big flavor payoffs. Give it a try this season and enjoy the bounty of your efforts!
Have you tried growing garlic from sprouts? Share your experiences or ask your questions in the comments below!