- Know when your pumpkins are ripe with the color, thumbnail, and stem tests.
- Harvest pumpkins before the first hard frost to prevent damage.
- Cure your pumpkins for longer storage and enjoy them throughout the fall and winter.
Pumpkins on a vine are a quintessential autumn sight, bringing a vibrant splash of color to any garden. From decorative gourds to carving pumpkins and of course, the key ingredient in delicious pies, these versatile fruits are a fall favorite. But how do you know when your pumpkins on a vine are ready for harvest? This guide will walk you through the process of harvesting and curing pumpkins, ensuring you get the most out of your pumpkin patch.
Recognizing Ripe Pumpkins on the Vine
Several key indicators signal that your pumpkins are ready to be harvested. Don’t rely on just one sign, but look for a combination of these factors for the best results.
Color Check
The deep orange hue of a ripe pumpkin is a tell-tale sign, but color can vary depending on the variety. Once the pumpkin on the vine reaches your desired color, it’s usually a good indicator of ripeness.
The Thumbnail Test
The skin of a ripe pumpkin should be hard. Try gently pressing your thumbnail into the pumpkin’s skin. If it’s difficult to pierce, your pumpkin is likely ready. If your nail easily penetrates the skin, give it more time on the vine.
 alt: Close up of a hand performing the thumbnail test on a pumpkin on the vine
Stem Examination
A healthy pumpkin vine has a green and sturdy stem. As the pumpkin matures, the stem will begin to dry and crack, signaling it’s time to harvest. In some cases, the pumpkin may even separate from the vine on its own.
The Hollow Sound
While less reliable, thumping a ripe pumpkin should produce a hollow sound. This can be subjective, but if you hear a dull thud rather than a resonant tone, the pumpkin might need more time.
Harvesting Your Pumpkins
Once you’ve determined your pumpkins are ripe, follow these steps for a successful harvest:
Protect Your Hands
Pumpkin vines are prickly! Always wear gloves to protect your hands during harvesting.
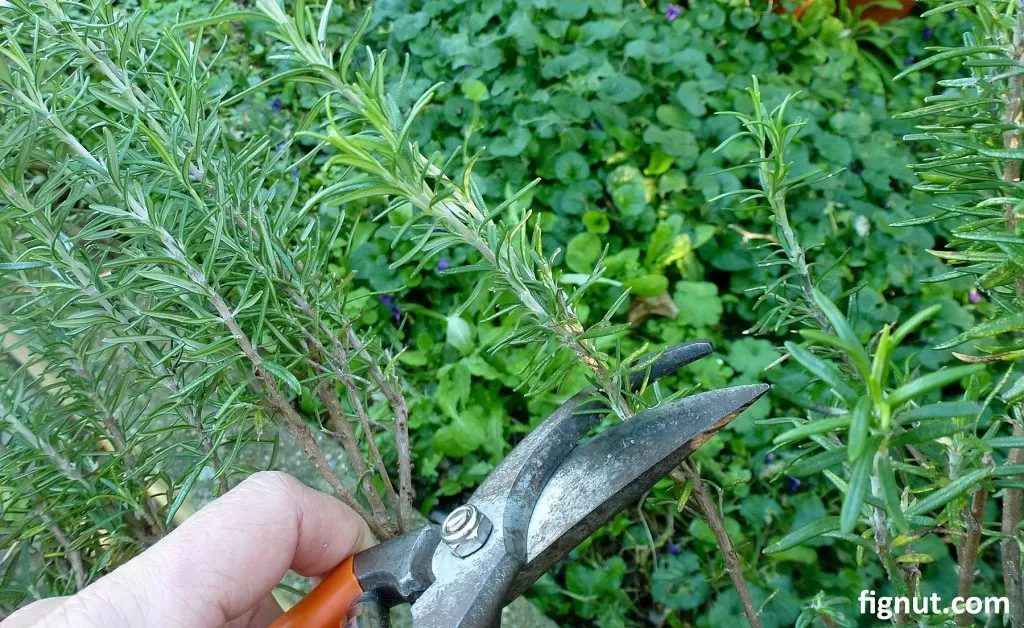
Cut the Stem
Use sharp shears or a knife to cut the stem, leaving several inches attached to the pumpkin. This helps prevent rot and provides a handle for carved pumpkins.
 alt: A hand using pruning shears to cut the stem of a pumpkin on the vine
Handle with Care
Avoid carrying pumpkins by the stem. Lift and carry them with both hands to prevent stem breakage and potential damage.
Curing Pumpkins for Long-Term Storage
Curing hardens the skin and helps preserve the pumpkin, extending its lifespan.
The Curing Process
Place harvested pumpkins in a sunny, dry location for 10 days to two weeks. Ideal curing conditions are warm temperatures (around 80°F) and high humidity (80%). Protect them from frost during this period.
 alt: Three pumpkins curing in the sun on a bed of straw
Storage Tips
After curing, store pumpkins in a cool, dry, well-ventilated area (around 50°F) for up to several months. Don’t stack them and keep them away from ethylene-producing fruits like apples.
Conclusion
Harvesting and curing pumpkins is a rewarding experience, allowing you to enjoy the fruits of your labor throughout the fall and winter seasons. By following these guidelines, you’ll be well on your way to a bountiful harvest of perfect pumpkins on a vine. Share your own pumpkin harvesting tips and stories in the comments below!