- Discover the ideal pot size for your bromeliad.
- Learn the best techniques for repotting bromeliads.
- Understand how to avoid common repotting mistakes.
- Ensure your bromeliad thrives after repotting.
Repotting bromeliads can seem daunting, but with the right knowledge and a little care, it’s a straightforward process. This guide will walk you through everything you need to know about repotting bromeliads, from choosing the right pot size to ensuring your plant thrives in its new home. Proper repotting is crucial for maintaining healthy bromeliads, as it allows for fresh potting mix and room for growth.
When and Why to Repot Bromeliads
Bromeliads, surprisingly, have relatively small root systems and often flourish in smaller pots than you might expect. Young plants are perfectly content in a 4-inch container. Repotting becomes necessary when your bromeliad starts to outgrow its current pot, typically indicated by roots circling the bottom or the plant appearing cramped. Spring is the ideal time for repotting, coinciding with the growing season. Mature bromeliads rarely require anything larger than a 6-inch pot. Using an oversized pot can lead to overwatering, a common problem for bromeliads.
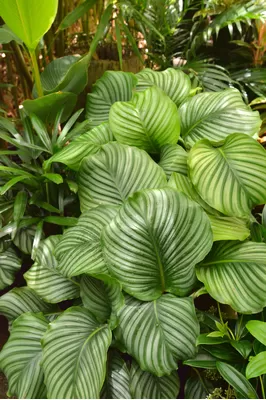
 Bromeliad pups in small pots
The Repotting Process
Whether you’re repotting a mature bromeliad or a small offset (pup), planting depth is crucial. Planting too deep or too shallow can be detrimental to the plant’s health. Aim to plant the bromeliad at the base of its leaves, which helps prevent crown rot, a fungal disease that can be fatal. If the root system isn’t robust enough to hold the plant upright in its new pot, use wooden stakes for support. Avoid letting the bromeliad wobble around in the pot, as this can damage the developing roots. Once the root system is established and can support the plant, the stakes can be removed.
Choosing the Right Pot and Potting Mix
Selecting the appropriate pot and potting mix is essential for successful repotting. As mentioned earlier, avoid oversizing the pot. A slightly larger pot than the previous one is usually sufficient. Opt for a pot with drainage holes to prevent waterlogging. A well-draining potting mix is also crucial for bromeliads. A mix specifically designed for orchids or bromeliads is a good choice, or you can create your own using a combination of bark chips, peat moss, and perlite.
Aftercare for Repotted Bromeliads
After repotting, water your bromeliad thoroughly, ensuring the excess water drains out. Place the plant in a location with bright, indirect light and avoid direct sunlight, which can scorch the leaves. Maintain a comfortable temperature and humidity level for your bromeliad. Regularly check the moisture level of the potting mix and water when the top inch feels dry.
Troubleshooting Common Repotting Problems
- Wilting: This can indicate either underwatering or overwatering. Check the moisture level of the potting mix and adjust your watering accordingly.
- Root rot: Overwatering and poor drainage can lead to root rot. Ensure the pot has drainage holes and use a well-draining potting mix.
- Slow growth: This could be due to several factors, including insufficient light, incorrect temperature, or nutrient deficiency.
Conclusion
Repotting bromeliads is a necessary part of their care. By following the guidelines outlined in this comprehensive guide, you can ensure a successful repotting experience and help your bromeliad flourish. Do you have any repotting tips to share? Leave a comment below! We’d love to hear from you. Explore Thelittle.garden for more insightful articles on bromeliad care and other gardening topics.