- Two main methods: Division (for faster results) and seeds (for potential variety).
- Timing is crucial: Spring is the ideal time for both methods.
- Patience is key: Sago palms grow slowly, so consistent care is essential.
- Well-draining soil: A must for healthy growth and to prevent root rot.
- Bright, indirect light: Essential for thriving sago palms.
Sago palm propagation is a rewarding journey for any plant enthusiast. Whether you’re looking to expand your existing collection or embark on a new adventure with seeds, this guide will provide you with the knowledge and confidence to successfully propagate these fascinating plants. Let’s explore the two primary methods of sago palm propagation: division and seed propagation.
Sago Palm Propagation Methods
## Division Propagation
Division is essentially cloning your sago palm. This method involves separating offsets, also known as pups, from the main plant. It’s a relatively straightforward process. Carefully remove the sago palm from its pot and lay it on its side. Gently separate the pups from the mother plant, ensuring each pup has a healthy portion of roots, leaves, and stem. Larger pups generally adapt more quickly, while smaller pups require more time to establish.
## Seed Propagation
Seed propagation offers the exciting possibility of growing a unique sago palm variety. This method involves harvesting, preparing, and sowing seeds. While it requires more patience than division, the potential rewards of a new variety can be well worth the wait. Seed propagation also helps in maintaining genetic diversity and avoiding the transmission of diseases from the parent plant.
## Comparing Propagation Methods
| Feature | Division | Seed Propagation |
|---|---|---|
| Speed | Faster | Slower |
| Variety | Identical to parent plant | Potential for new varieties |
| Success Rate | Higher | Lower |
| Disease Risk | Higher risk of disease transfer | Lower risk of disease transfer |
 Sago Palm plant in a pot with green fronds and well-drained soil.
Dividing Sago Palm Pups: A Step-by-Step Guide
Dividing sago palm pups requires precision and proper timing. Early spring is the best time to divide, allowing the pups ample time to establish themselves during the growing season.
## When to Divide
Divide the pups when they are large enough to have their own root system but before they overcrowd the pot. This typically occurs when the offsets have reached a substantial size.
## Division Process
- Carefully unpot the parent plant: Treat the root ball with care to minimize stress.
- Separate the pups: Gently tease apart the root ball with your hands or use a clean, sharp knife or saw if necessary.
- Ensure healthy roots: Each pup should have a good portion of roots to support its growth.
- Repot the pups: Plant each pup in a pot slightly larger than its root system, using fresh, well-draining soil.
- Water lightly: Water the newly potted pups to settle the soil.
- Provide bright, indirect light: Avoid direct sunlight, which can scorch young plants.
- Hold off on fertilizing: Allow the pups to establish themselves before introducing fertilizer.
## Tips for Successful Division
- Use sterilized tools to prevent the spread of diseases.
- Be patient, as sago palms grow slowly.
- Monitor the pups for signs of stress, such as drooping or discoloration.
 Top view of a healthy Sago Palm with vibrant green fronds and visible soil.
Sago Palm Propagation from Seed: A Detailed Guide
Seed propagation of sago palms is a longer but potentially more rewarding process. Here’s a step-by-step guide to get you started:
## Harvesting and Preparing Seeds
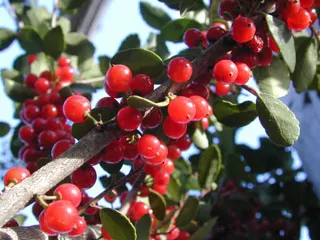
Harvest seeds when they have matured to a vibrant red or orange color. Wear gloves to protect yourself from the toxins present in the seeds. Soak the seeds in room-temperature water to soften the outer husk. Remove the husk after soaking.
## Sowing and Germination
Sow the seeds in a shallow tray filled with a well-draining seed-starting mix. Plant the seeds about half an inch deep and keep the soil consistently moist but not waterlogged. Place the tray in a warm location and be patient, as sago palm seeds can take several months to germinate.
## Optimal Conditions for Seedlings
Maintain a warm temperature and moderate humidity for optimal germination and seedling growth. Mist the seedlings occasionally to maintain humidity. Once the seedlings emerge, continue to provide gentle care as they develop.
 Healthy Sago Palm in a blue pot with green fronds.
Sago Palm Care after Propagation
Whether you choose division or seed propagation, providing proper care is essential for the long-term health of your sago palms.
## Soil, Light, and Water
Use a well-draining soil mix rich in organic matter. Sago palms thrive in bright, indirect light. Avoid overwatering, as this can lead to root rot. Allow the soil to dry out between waterings.
## Troubleshooting
Monitor your sago palms for signs of pests or diseases. Common issues include root rot, scale insects, and spider mites. Address these problems promptly to prevent further damage.
Conclusion
Sago palm propagation offers a unique opportunity to expand your plant collection and connect with the fascinating world of these ancient plants. Whether you choose the quicker route of division or the more adventurous path of seed propagation, following these guidelines will increase your chances of success. Share your experiences and questions in the comments below, and happy propagating!