- Add beautiful greenery and comfortable seating to any outdoor space.
- Learn how easy it is to construct stylish wooden planter boxes with an integrated bench.
- Discover material choices, step-by-step building instructions, and planting tips.
- Enhance your garden, porch, or patio with functional and charming DIY furniture.
Imagine stepping out onto your patio, a refreshing breeze on your skin, and settling onto a charming bench nestled between vibrant, lush plants. This isn’t just a daydream; it’s the reality you can create with simple DIY bench planter builds. Combining the beauty of container gardening with practical outdoor seating, these projects are perfect for small balconies, spacious decks, or cozy garden nooks. They add instant curb appeal and a touch of handmade warmth to your outdoor living areas. We’ll walk you through bringing this vision to life, making it accessible even if you’re new to woodworking.
Why Choose DIY Bench Planter Builds?
Opting for DIY bench planter builds offers a fantastic way to customize your outdoor space. You get to control the size, style, and materials, ensuring the finished piece perfectly complements your home and garden aesthetic. Beyond the aesthetic appeal, these builds are incredibly functional, maximizing space by combining seating and planting areas. It’s a rewarding project that results in a unique, usable piece of garden furniture you can proudly say you built yourself.
Gathering Your Materials and Preparing Your Wood
Embarking on DIY projects starts with selecting the right foundation – your wood. For outdoor furniture like a bench planter, choosing a wood type that can withstand the elements is key. Cedar is a popular choice due to its natural resistance to rot and insects, offering longevity and a beautiful look. Treated lumber is another durable option, specifically designed for outdoor use. While untreated woods like pine or spruce can be used, be aware they may require more maintenance and might not last as long unless properly sealed.
For this project, we’ll be working with a mix of standard lumber sizes. You’ll need some 2×4 boards, which we’ll cut down to create the structural 2×2 pieces for the planter frames. This is a common technique that saves on materials if 2×2 cedar isn’t readily available. You’ll also need 1×6 fence pickets. These are usually a more budget-friendly option compared to standard 1×6 boards, though it’s important to note they are typically slightly thinner (⅝” vs ¾”) and can vary a bit in width. This variation is something to keep in mind as you measure and cut.
Along with your wood, you’ll need exterior-grade wood glue and screws (both 1 ¼” and 2 ½” lengths are useful), plus some brad nails if you add decorative trim. A good exterior wood finish or sealant will also help protect your finished piece.
Speaking of preparing the wood, once you’ve made your initial cuts, especially for the frame pieces that will be seen, taking a moment to sand them down makes a big difference in the finished look and feel.
 Cedar fence pickets and 2×4 lumber ready for building DIY bench planter frames.
Accuracy is important when cutting wood, particularly when working with materials like fence pickets that might have slight variations. Having a table saw can be very helpful for making precise cuts, especially when ripping boards to a specific width.
Building Your Planter Boxes: Step-by-Step
The foundation of your DIY bench planter builds are the sturdy planter boxes on either end. You’ll build two identical boxes that will eventually be connected by the bench seat.
Constructing the Planter Frame
Start by cutting your 2x4s down into the necessary 2×2 pieces. You’ll need enough for four legs and eight frame pieces for each planter box. For a typical bench planter, the legs are often around 27 inches long, and the frame pieces around 12 ½ inches. Once cut and sanded, you’ll assemble these using exterior screws. To prevent the wood from splitting, pre-drill your screw holes. A little tip is to slightly offset the screws at the corners so they don’t run into each other inside the wood. Assemble two of these frames to form the basic skeleton of your planters.
 Assembling the base wooden frame for a DIY planter box using exterior screws.
Adding the Planter Box Sides
Next, you’ll line the inside of the frames to create the walls of the planter box. Cut pieces of your fence picket to fit the height of your frames. Sand these pieces before attaching them. Screw two pieces onto the inside of opposing sides of the frame, pushing them to the outer edges. You’ll notice a gap in the middle. Then, add two more pieces to the remaining two sides. Again, you’ll likely have some gaps between these. Measure the gaps you need to fill on the first two sides (they should be the same on both). Rip down a fence picket on a table saw to the necessary width to fill these gaps and screw these filler strips into place. Don’t worry if there are very small gaps; they won’t be visible once the pot is inside. Repeat this process for the second planter box.
 Interior view of the DIY planter box frame showing installed cedar fence picket side panels.
Adding Decorative Details: The X-Trim
This step is optional, but adding a decorative “X” pattern to the sides of your planters really elevates the look of your DIY bench planter builds. You can add this detail to the three visible sides of each planter, leaving the side where the bench attaches plain. Cutting the angles for this kind of trim can seem tricky, but there’s a simple method that requires no math! You can find video tutorials online that show how to hold your trim piece in place and mark the cut lines directly. Once cut, attach the X-trim pieces to the outside of the planter frame using exterior wood glue and brad nails.
 Adding decorative X-trim detail to the exterior sides of the DIY wooden planter box.
Building and Attaching the Bench Frame and Seat
With your two planter boxes ready, it’s time to add the seating component that turns them into DIY bench planter builds.
Assembling the Bench Frame
This is quite straightforward. You’ll cut two 2×4 pieces to span between the two planter boxes for the front and back bench supports. Decide how high you want your bench seat (around 16 inches from the ground is typical) and mark that height on the inside of the 2×2 legs on both planters. Screw the 2×4 supports into the inside of the 2×2 legs at your marked height. Then, cut shorter pieces of 2×4 to act as cross supports for the seat. Place these between the front and back supports – two at each end and a couple spaced evenly in the middle – and screw them into place.
 Assembled wooden bench frame connecting the two planter boxes, part of DIY bench planter builds.
Installing the Bench Seat Slats
For the seat, you’ll use your fence pickets again. Cut pieces to fit the length of your bench frame. Two fence pickets placed side-by-side might leave a gap in the middle. Just like with the planter sides, measure this gap and rip down a piece of fence picket to fill it. Screw these three seat slats securely into the bench frame supports below.
Planting Your Beautiful Planters
Now for the fun part – adding the greenery that brings your DIY bench planter builds to life!
Choosing the right containers for inside your wooden planters is important. Many people use nursery pots because they are lightweight and offer good drainage. If you built your planters to fit a specific size pot (like 6.24-gallon nursery containers), they might just drop right in, resting on the inner frame or added supports. If you’re using smaller pots or want more flexibility, you can easily add a simple shelf inside the planter by screwing scraps of wood horizontally along the inner walls and placing a piece of fence picket across them to support your pot at the desired height.
Selecting the right plants is key to the success and beauty of your bench planters. Consider the light conditions where your bench will sit. If it’s a sunny spot, choose sun-loving annuals or perennials. For shade, impatiens, ferns, or hostas work wonderfully. The original builders of this project used Dieffenbachia plants.
- Scientific Name: Dieffenbachia
- Common Name: Dumb Cane
- Zone: Typically grown as houseplants in zones 10-12 or as annuals in colder climates.
- Light: Prefers low to bright indirect light. Direct sunlight can scorch the leaves.
- Humidity: High humidity is ideal.
- Water: Keep the soil consistently moist but not waterlogged. Water when the top inch of soil feels dry.
Remember to use a high-quality potting mix in your containers. Potting mix is formulated to provide good drainage and aeration, essential for healthy root growth in containers.
 Filling a plant nursery pot with high-quality potting mix before planting in the DIY planter.
Once your pots are filled and planted, simply drop them into your finished wooden planters. The beauty of using pots inside is that you can easily swap out plants seasonally to keep your bench looking fresh and vibrant year-round.
Tips for Success and Enjoyment
To ensure your DIY bench planter builds last for years to come, apply an exterior-grade sealant or paint to the wood after building, following the product’s instructions. This will protect against moisture damage and UV rays. Remember to check your plants regularly, especially during warm weather, as container plants tend to dry out faster than those in the ground. Ensure your inner pots have drainage holes to prevent root rot.
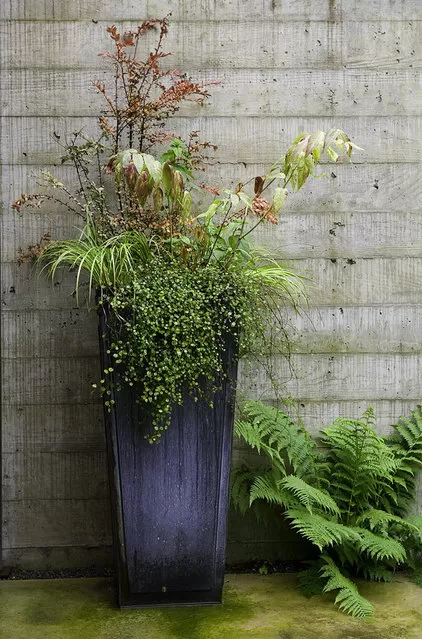
 Close-up vertical view of the complete DIY bench planter build, showcasing plants and wood detail.
Conclusion
Building your own bench planter is a rewarding project that adds significant charm and utility to your outdoor space. These DIY bench planter builds are more than just furniture; they are functional art pieces that invite you to relax and enjoy the beauty of your garden. Whether you use them on a porch, patio, or as a focal point in your backyard, they provide a perfect spot to sit among your favorite plants.
Ready to create your own? Gather your materials, follow these steps, and soon you’ll be enjoying your beautiful, handcrafted garden bench. If you loved this project, share it with your fellow garden enthusiasts! Have you tackled a similar DIY project? Share your experience in the comments below. And don’t forget to explore Thelittle.garden for more inspiration and guides to help you cultivate your perfect outdoor oasis.