- Unlock the magic of your outdoor spaces after sunset with strategic lighting.
- Low-voltage systems offer safety, efficiency, and flexibility for stunning effects.
- Careful planning and selecting the right light types are key to a beautiful design.
- LED bulbs provide long-lasting, energy-efficient illumination with versatile color options.
- From DIY basics to professional installations, creating your illuminated oasis is achievable.
Your garden and landscape are beautiful by day, but what happens when the sun goes goes down? Don’t let their charm fade into darkness! Imagine stepping out into your yard after sunset, where pathways glow softly, favorite trees become dramatic sculptures, and architectural details of your home are subtly highlighted. This isn’t just fantasy; it’s the power of well-executed garden lighting landscape ideas. By adding thoughtful illumination, you can extend the usability and beauty of your outdoor spaces, enhance safety and security, and create breathtaking curb appeal that shines all night long. This guide will walk you through how to bring your landscape to light, transforming your property into a stunning nocturnal retreat.
Why Light Your Landscape?
Landscape lighting is far more than just flipping on a porch light. It’s an art form that paints your property with light and shadow, revealing hidden textures, highlighting focal points, and sculpting the overall atmosphere of your garden and yard. The primary goal is to create a balanced, inviting, and functional environment that extends your living space beyond your walls, making patios, decks, and garden rooms usable and enjoyable after dark.
Most modern landscape lighting systems rely on low-voltage power. This means instead of using the standard 120 volts from your home, the power is safely stepped down to 12 volts by a transformer. This low-voltage approach makes installation safer and more flexible, allowing you to create a wide array of effects, from subtle washes of light on surfaces to dramatic accent lighting on trees, sculptures, or architectural elements of your home.
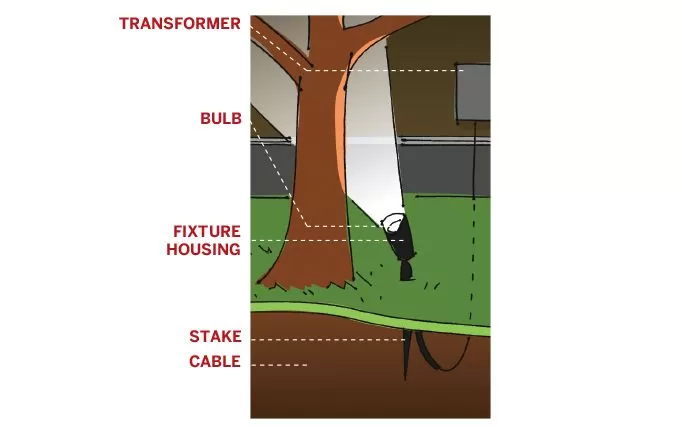 Diagram showing a landscape uplight fixture installed at the base of a tree, illustrating a low-voltage outdoor lighting system connection.
Planning Your Dream Garden Lighting Design
Bringing your garden lighting landscape ideas to life requires thoughtful planning. A successful design isn’t just about where to put lights; it’s about understanding your property, deciding what you want to showcase, and creating a harmonious nighttime scene. Think of it as designing a whole new look for your yard after dark.
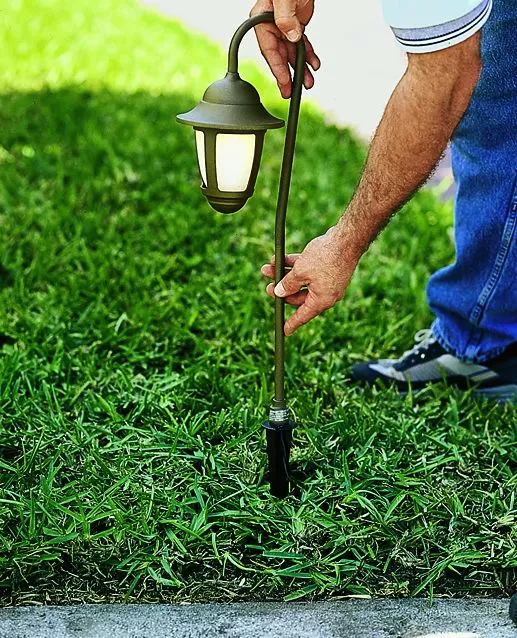 Close-up image of a person installing a landscape light fixture by pushing the stake into the lawn, part of planning garden lighting landscape ideas.
Mapping Your Outdoor Canvas
Start by creating a simple map of your property. Sketch out your home, existing trees, shrubs, flower beds, pathways, driveways, patios, decks, and any other features you love. This map is your blueprint. Now, look at it and ask: What do you want to see at night? What areas do you use? What are the safety concerns? Which plants or architectural features deserve a spotlight?
Consider how you want light to guide the eye. As lighting expert Mark Piantedosi advises for DIYers, “You want pools of light to guide your eye from one plant to the next, not continuous illumination.” Placing fixtures strategically, often more than 20 feet apart for accent lighting, helps create these inviting pools and adds depth.
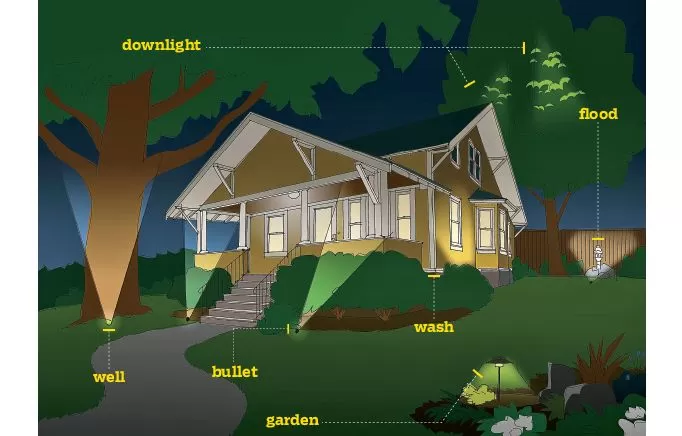 Illustration depicting a home and surrounding landscape with various low-voltage lighting techniques illuminating pathways, trees, and architectural features.
Highlighting Your Home’s Beauty
Your home’s facade is the centerpiece of your landscape, even at night. Use lighting to accentuate its best features. Narrow-beam “bullet lights” are perfect for drawing attention to architectural details like columns, gables, or unique stonework. Place them close to the foundation and angle them upwards. To avoid a patchy look, use softer “wash lights” in between these focal points to provide a gentle, even illumination across walls, creating a layered and inviting look.
Bringing Plants to Life After Dark
Trees, shrubs, and garden beds can become magical focal points when properly lit. “Uplighting” is a popular technique for trees, placing fixtures at the base and aiming upwards into the canopy. For smaller trees (under 20 feet), two 20-watt lights might be enough. Larger trees might need three to five 35 to 50-watt lights. Remember to illuminate both the trunk and some of the branches or canopy to prevent the tree from looking like it’s floating strangely in the air.
In planting beds, use smaller garden lights or strategically placed spot or well lights to graze textures or highlight individual plants. This creates interesting shadows and depths, making your garden look vibrant and alive even after sunset.
Key Types of Garden & Landscape Lights
Understanding the different types of fixtures available is crucial for implementing your garden lighting landscape ideas effectively. Each type serves a specific purpose in creating your desired look and feel.
Garden & Path Lights
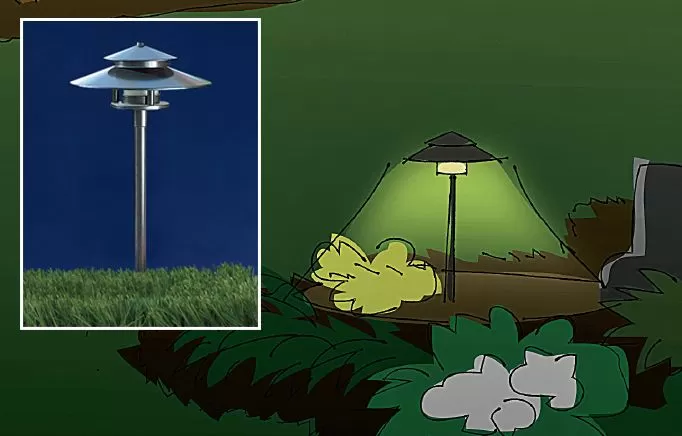 Stylized drawing of a garden path light fixture with a post, casting a downward glow to illuminate planting beds and walkways.
Typically mounted on short posts (18-24 inches), these are versatile fixtures ideal for illuminating pathways, guiding visitors safely, and defining the edges of garden beds. They cast a downward or outward glow and often feature decorative designs that contribute to the landscape’s daytime appearance as well.
Wash Lights for Soft Glows
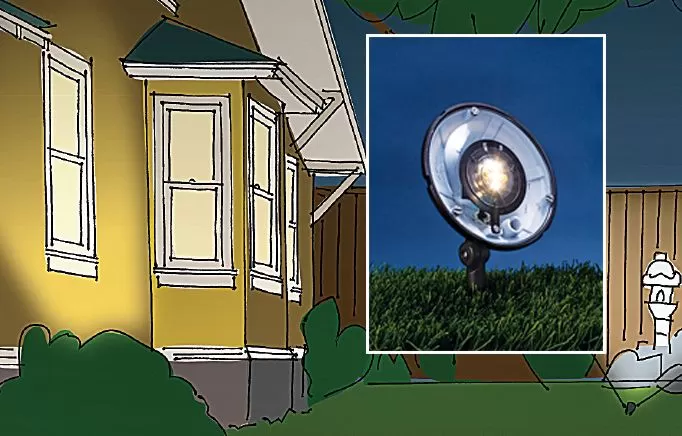 Illustration showing a wash light fixture casting a soft, diffuse light across the facade of a house, ideal for wall washing in landscape lighting.
Wash lights produce a broad, soft, diffused light. They are excellent for evenly illuminating flat surfaces like house facades, privacy fences, and retaining walls. They create a gentle backdrop and can make areas feel larger and more welcoming without harsh spots.
Bullet Lights for Focused Drama
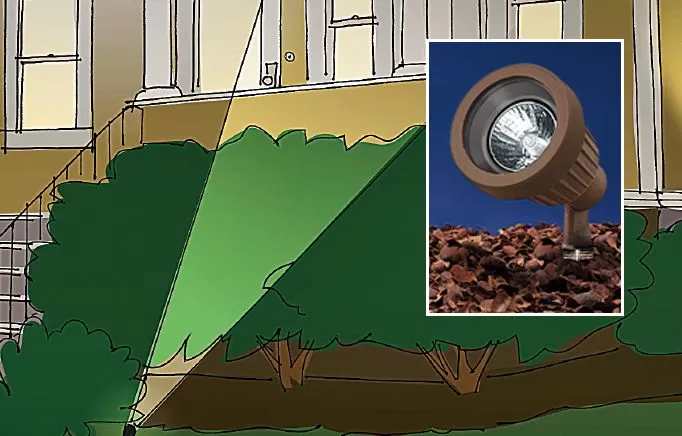 Drawing depicting a compact bullet light fixture aiming a focused beam onto a house wall to highlight architectural details, demonstrating accent lighting.
These compact fixtures emit a tight, focused beam of light, often used with narrow-beam bulbs. Bullet lights are perfect for “spotlighting” specific features such as statues, tree trunks, architectural columns, or signs. They create high contrast and dramatic effects.
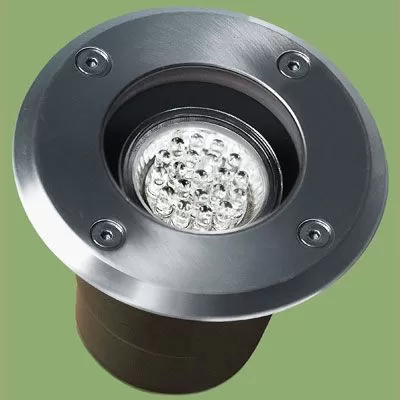
Well Lights for Subtle Uplighting
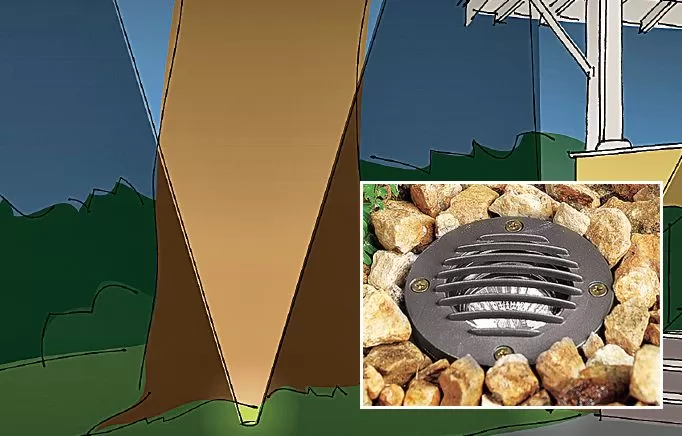 Illustration showing a well light fixture recessed into the ground, casting an upward light beam to illuminate the trunk and canopy of a tree.
Installed directly into the ground, well lights are discreet during the day. They are ideal for powerful uplighting of trees, walls, or the undersides of plant foliage, providing dramatic effects where the light source is hidden from view.
Downlights Mimicking Moonlight
 Drawing illustrating a downlight fixture mounted high in a tree, projecting light downwards to create a moonlighting effect on the ground or foliage.
Mounted high up in trees or on structures, downlights cast light downwards, simulating the effect of natural moonlight filtering through branches. They are excellent for softly illuminating patios, pathways, or garden areas from above and often use shrouds to reduce glare.
Flood Lights for Broad Coverage
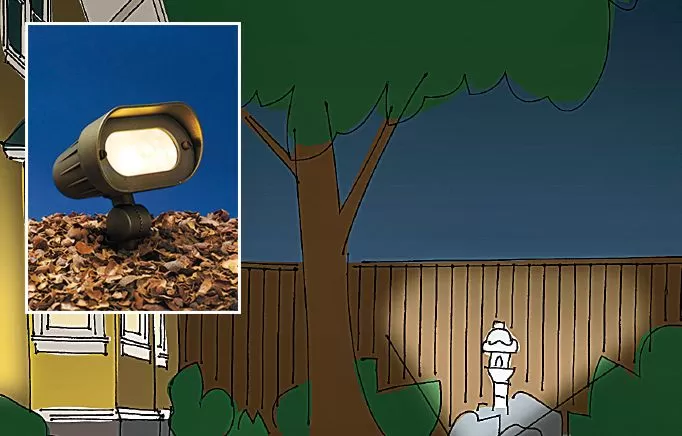 Illustration depicting a flood light fixture casting a wide beam of light onto a wooden fence, used for broad area illumination in landscape lighting.
Flood lights provide a wide beam of light (typically 40 degrees or more) and are brighter than wash lights. They are used sparingly for illuminating large areas such as expansive lawns, tall trees, or broad facades, providing significant coverage.
Choosing the Perfect Bulbs
The bulb you choose significantly impacts the look, feel, and cost-effectiveness of your landscape lighting. The two main players are LED and halogen.
 Close-up image of a landscape light fixture head featuring a modern LED bulb, highlighting energy-efficient outdoor lighting technology.
LED vs. Halogen: The Smart Choice
LED (Light Emitting Diode) bulbs have become the standard for good reason:
- Longevity: LEDs can last up to 40,000 hours or more (20+ years of typical use), compared to halogen’s 2-year lifespan.
- Energy Efficiency: LEDs use significantly less power (1-11 watts vs. 20-60 watts), drastically cutting electricity bills.
- Durability: They are more resistant to weather, vibration, and physical shock.
- Lower Heat: LEDs emit much less heat, making them safer for plants and less of a fire hazard.
While LEDs have a higher upfront cost, their massive savings on energy and replacement bulbs make them far more economical and environmentally friendly over the life of the system.
Color Temperature: Setting the Mood
Color temperature, measured in Kelvins (K), describes the light’s warmth or coolness.
- Warm White (2700K – 3000K): This range mimics the cozy, inviting glow of incandescent or candlelight. It’s perfect for creating a soft, welcoming ambiance around patios, pathways, and facades. Look for LEDs specifically labeled “warm white.”
- Cool White (4000K+): This range appears brighter and whiter, sometimes with a slight blue tint. It can create a crisp, modern, or moonlight-like effect but might feel harsh in some residential settings.
Most homeowners prefer the warmth of 2700K-3000K for a natural, inviting feel in their landscape. Early LEDs often had a very cool, almost blue light (around 6000K), but modern options offer excellent warm white tones.
Lumens: Finding the Right Brightness Balance
Lumens measure the total amount of light a bulb emits. Instead of focusing on watts (which measure energy consumption), pay attention to lumens for brightness. Here are some general lumen guidelines:
- Path lights: 100-200 lumens
- Landscape accent lights (for trees/features): 50-300 lumens
- Flood lights (for large areas): 700-1300 lumens
The goal isn’t blinding brightness but rather creating balanced illumination that enhances your garden’s features without overpowering them. Too much light can look unnatural and cause light pollution.
Understanding Low-Voltage Systems
As mentioned, low-voltage systems are the go-to for most residential garden lighting landscape ideas. Let’s delve a bit deeper into why and what they involve.
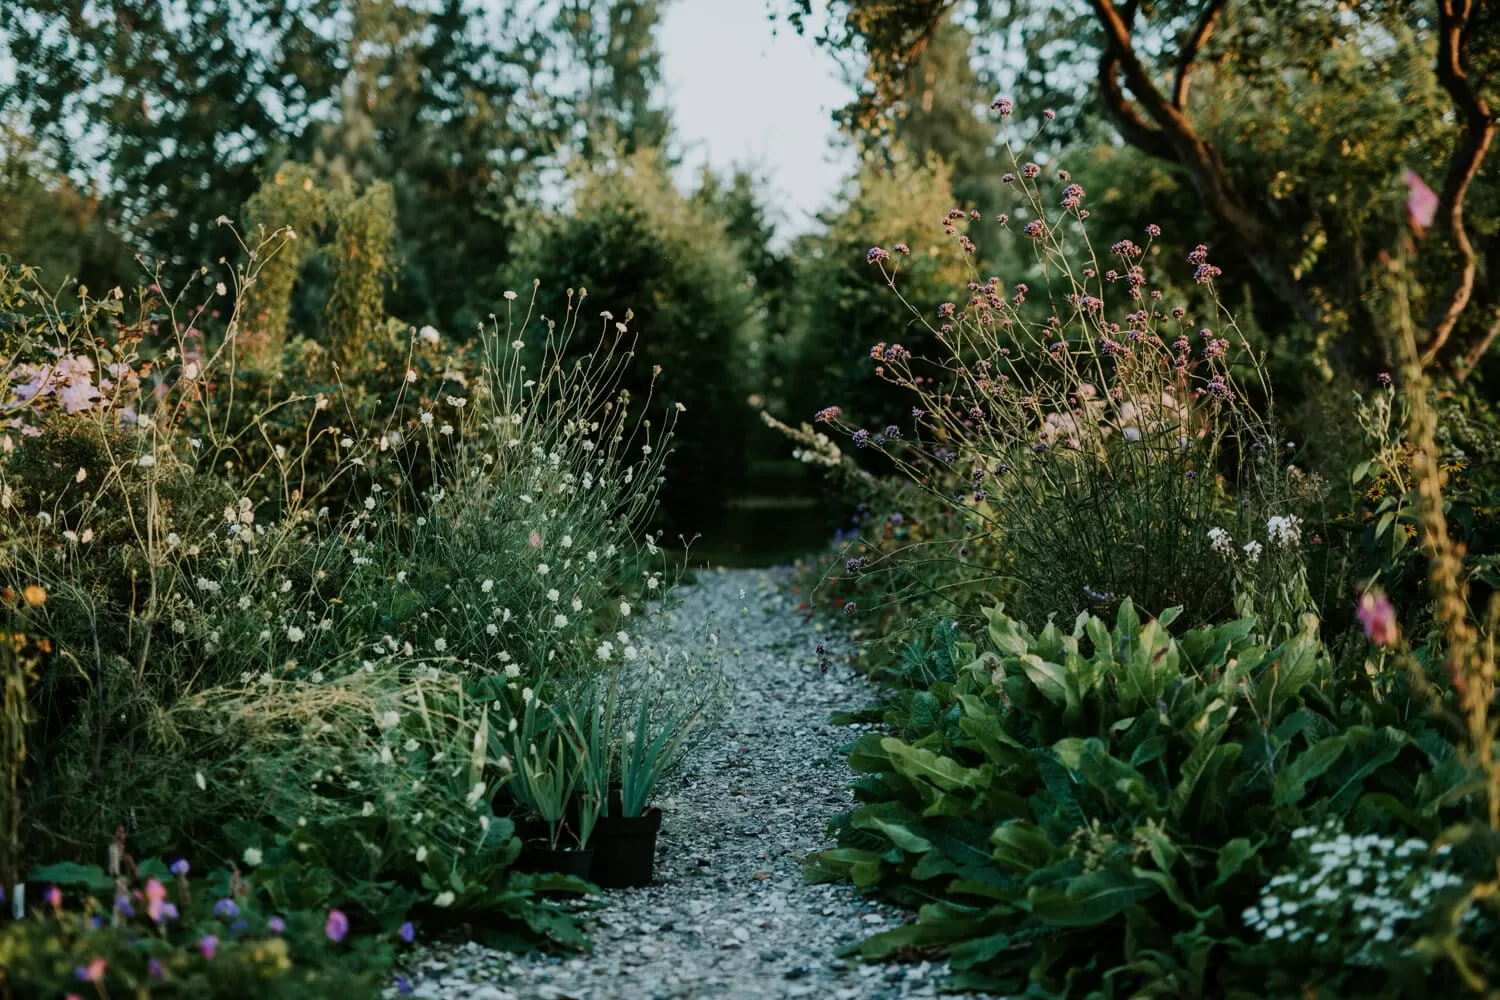
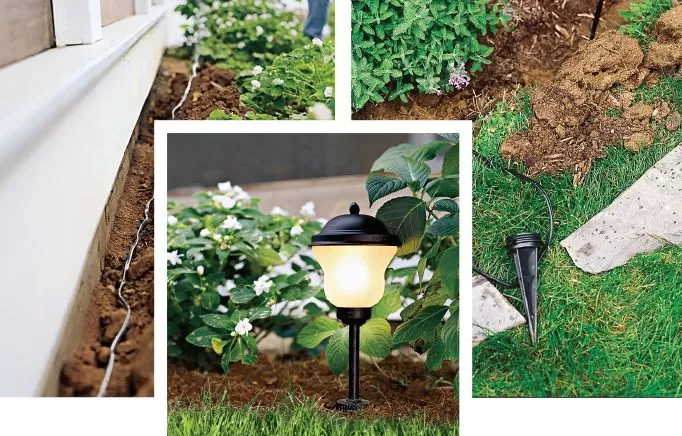 Installed low-voltage landscape lighting fixtures along a garden path, showcasing a typical residential outdoor lighting system setup.
Why Go Low-Voltage?
The advantages are compelling:
- Safety: At just 12 volts, the risk of serious electrical shock during installation or maintenance is drastically reduced compared to 120-volt systems.
- DIY-Friendly: For simpler designs, homeowners can often install these systems themselves, saving on labor costs.
- Flexibility: It’s easy to add, move, or change fixtures as your landscape evolves.
- Efficiency & Cost: Paired with LED bulbs, low-voltage systems consume minimal power and are less expensive to install than high-voltage, which often requires licensed electricians and deeper trenching.
Essential System Components
A typical low-voltage setup includes:
- Transformer: This is the heart of the system, plugging into a standard outdoor GFCI outlet and stepping down the voltage. Size your transformer based on the total wattage of all your planned lights, plus a little extra (around 25%) for future additions.
- Low-Voltage Cable: This cable carries the power from the transformer to the lights. It needs to be rated for outdoor, direct-burial use and should be buried at least six inches deep to prevent damage from digging or lawn care.
- Fixtures: The lights themselves, chosen based on their type (path, spot, wash, etc.) and intended use.
- Bulbs: The light source within the fixture (ideally LED).
- Controls: Timers, photocells (turn on at dusk, off at dawn), or smart home integration systems allow you to automate your lighting schedule.
To ensure even brightness across all your lights, especially on longer runs, consider using a “hub” system. Run a heavier gauge cable (like 10-gauge) from the transformer to a central, waterproof junction box, then branch off to fixtures using lighter gauge cable (like 12-gauge) of roughly equal length for each branch. Try to keep cable runs under 50 feet where possible to minimize voltage drop.
DIY or Pro? Installing Your Landscape Lights
Many aspects of low-voltage landscape lighting installation are within the reach of a confident DIYer. However, knowing when to call in a professional can save you time, frustration, and potential headaches.
Your Basic DIY Steps
If you’re tackling a simple system:
- Finalize Your Plan: Mark fixture locations and cable routes on your physical landscape based on your map.
- Mount the Transformer: Choose a location near a GFCI outdoor outlet (have one installed by an electrician if needed).
- Lay Out Cable & Fixtures: Run the main cable along your planned routes. Place the fixtures roughly where they’ll go.
- Connect Fixtures: Use the included connectors to attach fixture wires to the main cable.
- Test: Before burying, plug in the transformer and test all lights to ensure they work and are positioned correctly.
- Bury Cable: Dig shallow trenches (minimum 6 inches deep) and tuck the cable away safely.
- Set Controls: Configure your timer or other control system.
- Adjust: Fine-tune fixture angles and positions at night to get the perfect effect.
Knowing When to Call in the Experts
Some scenarios are better suited for professional landscape lighting installers:
- Complex Designs: Systems with multiple zones, intricate wiring, or advanced control systems.
- Difficult Terrain: Rocky ground, significant slopes, or existing dense landscaping that makes trenching hard.
- Integration: Connecting to existing electrical systems, smart home networks, or security systems.
- Large Properties: Extensive areas require more planning for power distribution and fixture placement.
- Lack of Confidence: If you’re not comfortable working with even low-voltage electrical components.
Professionals have the expertise to design a system optimized for your property, access higher-quality fixtures, understand voltage drop calculations, and ensure everything is installed safely and correctly, often with warranties.
Inspiring Garden Lighting Landscape Ideas
Now for the fun part – the creative ideas that will truly bring your garden to life after dark using the power of landscape lighting!
Creating a Welcoming Home Facade
Make your home stand out beautifully at night. Use uplighting to highlight attractive textures like stone or brick, or architectural features like columns or dormers. Place fixtures about a foot from the base of the wall and angle them up. Use a mix of narrow beams for focused accents and wider beams or wash lights for softer, broader illumination to create depth and visual interest. This not only looks stunning but also enhances security.
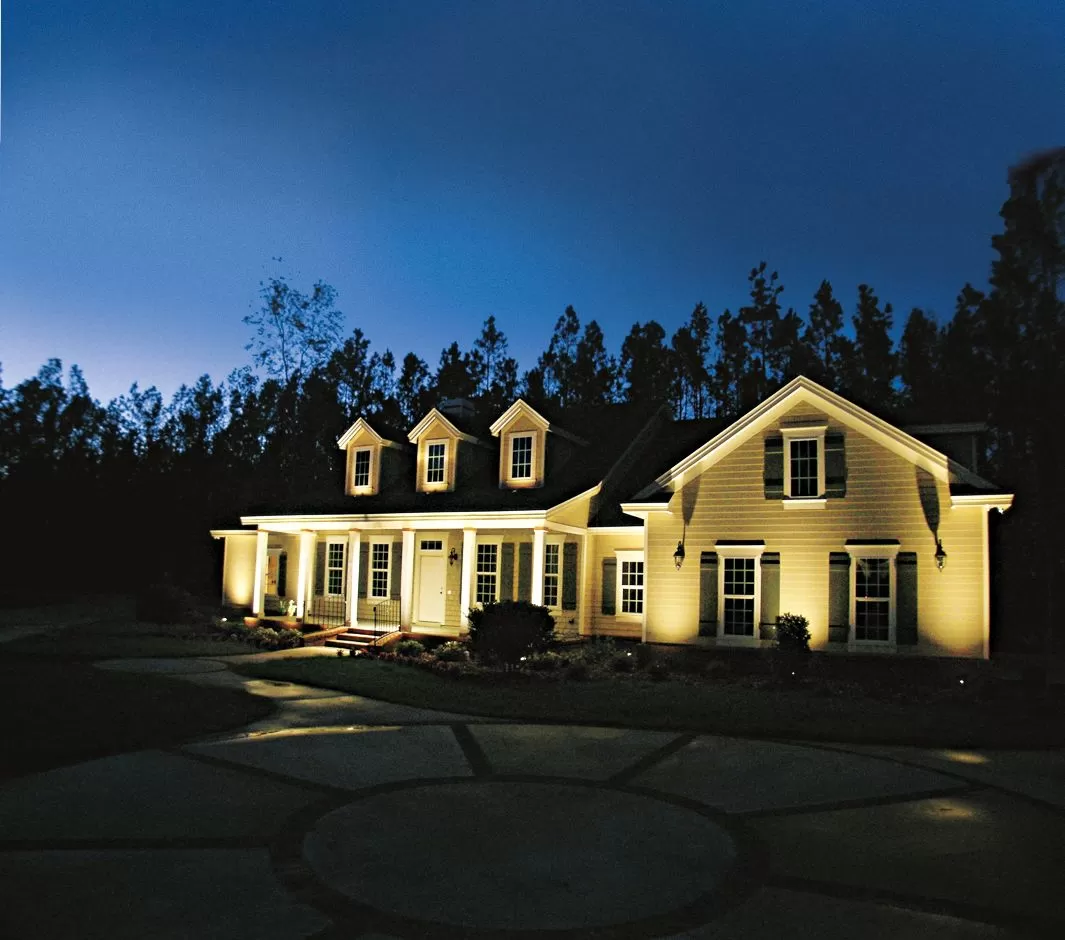 A house facade illuminated at night by strategically placed landscape lighting, highlighting architectural details and creating a welcoming entrance.
Lighting Outdoor Living & Entertainment Areas
Transform your patio, deck, or outdoor kitchen into a comfortable extension of your home. Tree-mounted downlights can cast a soft, natural “moonlight” glow over seating areas. Subtle path lights or well lights around the perimeter define the space without glare. Consider lighting outdoor kitchens for functionality and ambiance. The goal is creating a relaxed, inviting atmosphere perfect for evening gatherings.
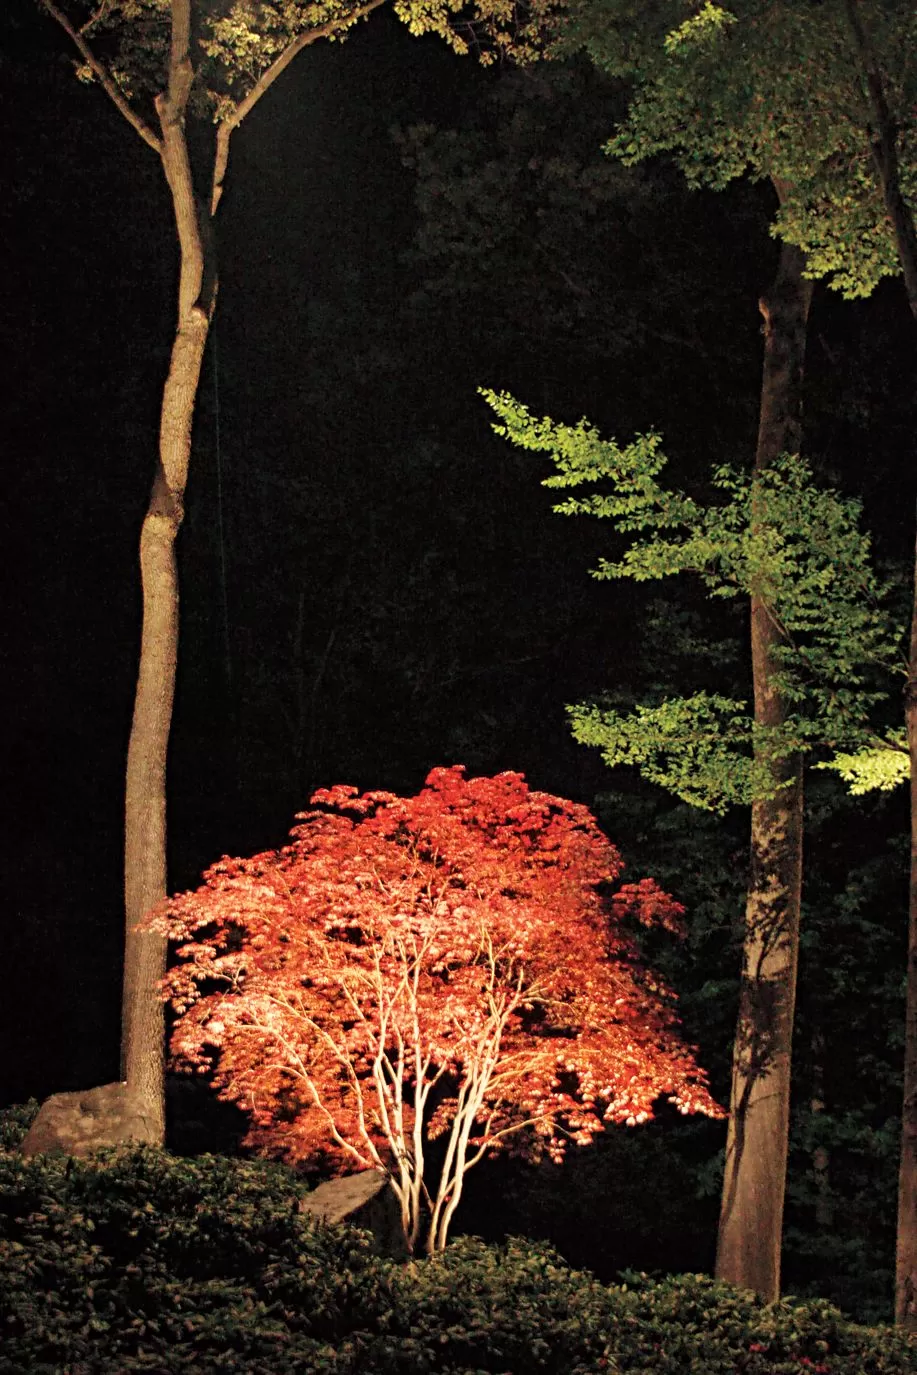 An autumnal tree with vibrant red leaves dramatically uplighted at night by landscape fixtures, showcasing how lighting enhances tree beauty.
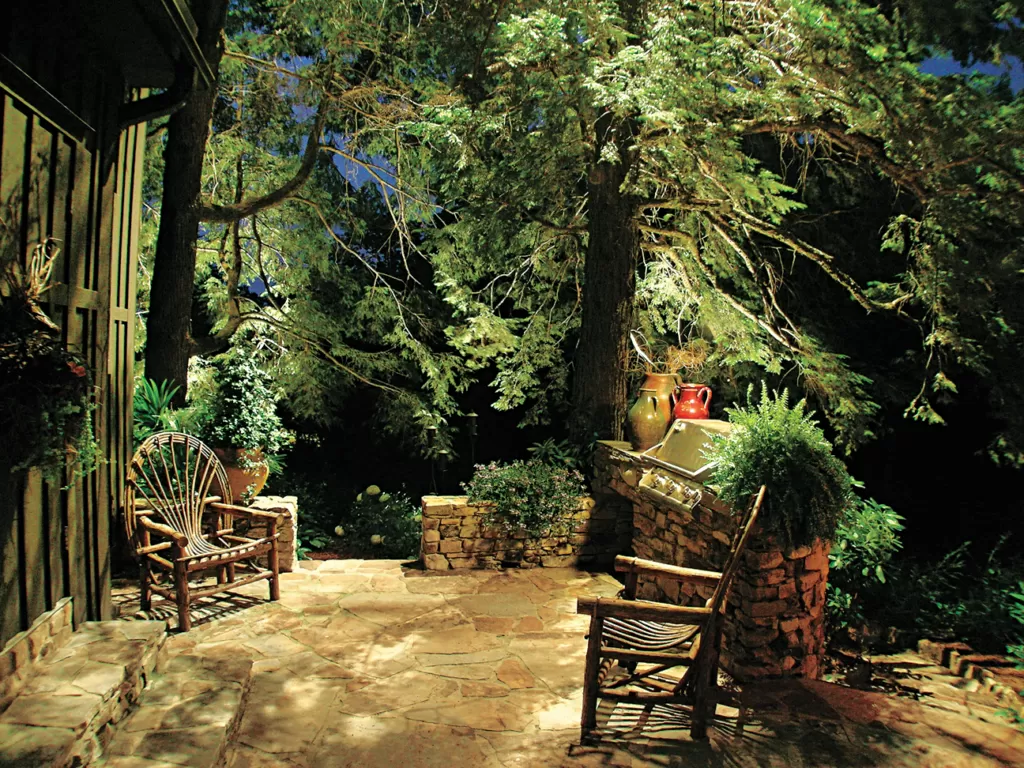 A stone patio furnished with chairs and a grill, illuminated at night by soft landscape lighting to create an inviting outdoor living and dining area.
Illuminating Paths & Driveways Safely
Safety is paramount for walkways and driveways. Path lights placed 6-8 feet apart effectively guide visitors safely to your door, preventing trips and falls. Choose fixtures whose style complements your home. For driveways, a combination of low path lights along the edges and perhaps downlighting from nearby trees can provide necessary illumination without creating a harsh, institutional feel.
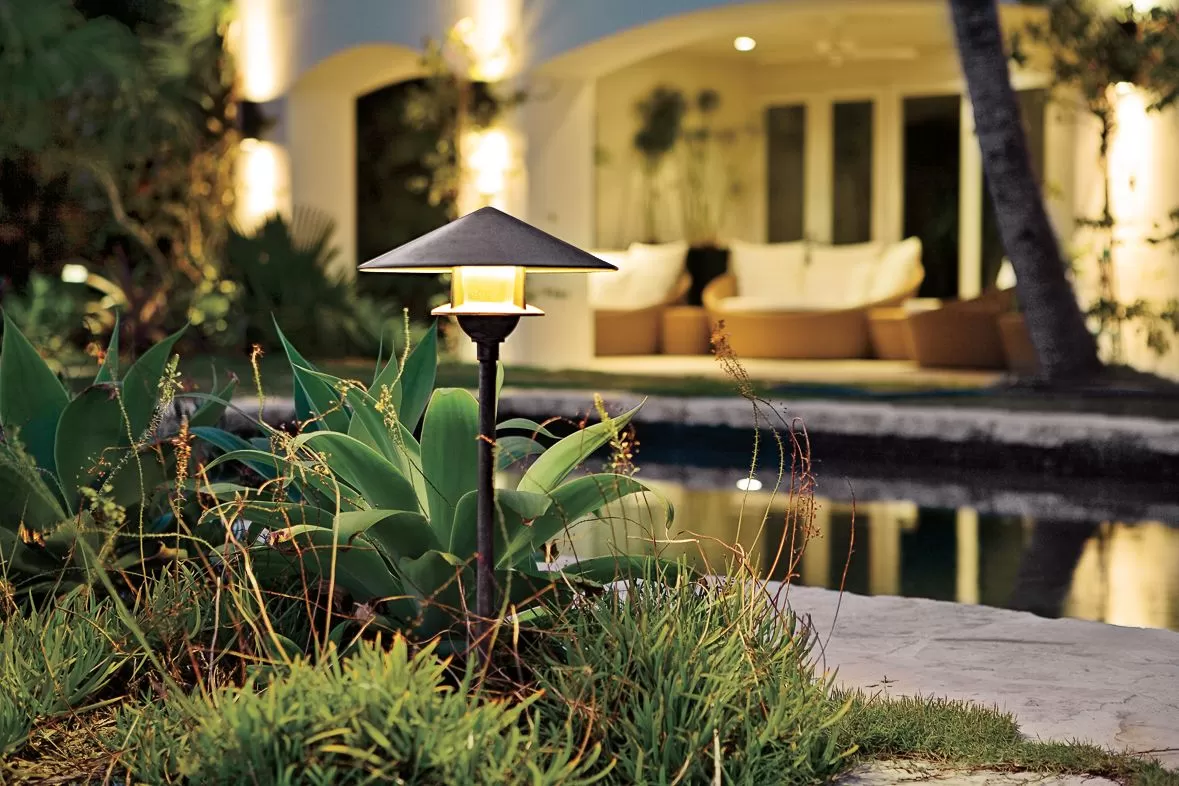 A glowing garden path light fixture at night, casting light onto nearby foliage to illuminate a walkway and add curb appeal.
Maintaining Your Lighting System
Once your beautiful garden lighting landscape ideas are installed, a little regular maintenance will keep everything looking its best and functioning reliably for years to come.
Simple Maintenance Steps
- Keep Clean: Periodically wipe down fixture lenses and housings to remove dirt, pollen, and debris that can dim the light.
- Check & Adjust: As plants grow, ensure they aren’t blocking or damaging fixtures and wires. Readjust fixture angles as needed to maintain your desired effect.
- Inspect Wires: Check for any exposed wires or damaged connectors, especially after heavy weather or gardening activities. Bury any unearthed cables promptly.
- Proactive Bulb Replacement: While LEDs last a long time, if you have mixed or older systems, replace bulbs as they start to dim or flicker rather than waiting for them to burn out, which can stress the transformer or other lights.
Troubleshooting Common Problems
- Lights Flickering or Dim: This is often due to loose connections or voltage drop. Check all wire connectors and ensure your transformer is sized correctly and distributing power evenly (a hub system helps here).
- Lights Not Working: Check the transformer (is it plugged in? is the breaker tripped?), timer/control settings, and individual bulbs. A single faulty connection can sometimes take down a whole circuit.
- Corrosion: If you live near the coast, salt spray can cause corrosion. Use fixtures made of durable materials like brass or copper which patina beautifully rather than corroding.
- Water in Fixtures: Ensure fixture seals are intact and connectors are waterproof. Standing water around well lights can be an issue if not properly drained.
Our Conclusion
Implementing garden lighting landscape ideas is one of the most impactful ways to enhance the beauty, safety, and enjoyment of your home after dark. By understanding the basics of low-voltage systems, planning strategically, choosing the right fixtures and bulbs, and putting thought into design, you can transform your yard into a magical, functional, and inviting space that shines all night long. Whether you choose to DIY or hire a pro, bringing your landscape to light is an investment that pays dividends in curb appeal, usability, and personal enjoyment.
Ready to illuminate your garden oasis? Share your own garden lighting landscape ideas in the comments below or explore more ways to enhance your outdoor living on Thelittle.garden!