- Key Takeaways:
- Harvest lavender just as the flowers begin to open for peak fragrance and color.
- Proper preparation, including gentle cleaning and bundling, is crucial for successful drying.
- Air drying is the most recommended method for preserving lavender’s best qualities, though other methods exist.
- Store dried lavender in airtight containers away from light to maintain its scent for months, even years.
Imagine your home filled with the calming, timeless scent of lavender, long after its blooming season has faded. Learning how to dry lavender is a delightfully simple skill, and it’s your ticket to preserving this cherished herb’s beauty and potent aroma. This guide will walk you through each step, transforming your fresh lavender sprigs into fragrant treasures that can be enjoyed year-round. Get ready to capture the essence of summer in your hands!
Why Dry Lavender? The Aromatic Benefits Await
Drying lavender isn’t just about keeping pretty flowers around; it’s about bottling up that incredible fragrance and vibrant color. When you learn how to dry lavender, you unlock a world of possibilities. Preserved lavender can be used in countless ways, from creating soothing sachets and potpourri that perfume your home, to adding a delicate floral note to culinary creations, or crafting beautiful, long-lasting decorations. It’s a sustainable way to enjoy your garden’s bounty long after the growing season.
The Perfect Harvest: When and How to Gather Your Lavender
The journey to perfectly dried lavender begins in the garden. Timing and technique are everything!
Timing is Everything: When to Harvest Lavender
For the most potent fragrance and deepest color, harvest your lavender just as the tiny flowers begin to open. Look for stems where about one-third to one-half of the buds have bloomed, while the rest are still tightly closed. A tell-tale sign is a happy buzzing sound – when the bees are busy, your lavender is often at its peak! The best time of day to harvest is in the morning, after the dew has evaporated but before the sun’s heat becomes too intense, as this is when the essential oils are most concentrated.
The Gentle Snip: How to Harvest Lavender Correctly
Arm yourself with a pair of clean, sharp scissors or pruning shears. You want to make a clean cut to avoid damaging the plant. Cut the lavender stems as long as possible, gathering a good length for bundling. Aim to cut just above the woody part of the plant or above a set of leaves to encourage new growth.
Here’s a little more about the star of the show:
- Scientific Name: Lavandula spp. (Species like Lavandula angustifolia – English Lavender – are particularly prized for drying)
- Common Name: Lavender
- Zone: Typically USDA zones 5-9, though this can vary by specific lavender variety.
- Light: Full sun is a must – at least 6-8 hours of direct sunlight per day.
- Humidity: Lavender prefers low to moderate humidity and good air circulation to prevent fungal issues.
- Water: Once established, lavender is quite drought-tolerant. Water deeply but infrequently, allowing the soil to dry out between waterings.
 Gardener's hands carefully harvesting fresh lavender stems with purple blooms for drying.
Prepping Your Lavender: The First Step to Fragrant Success
Once your fragrant harvest is gathered, a little preparation goes a long way.
Cleaning and Bundling Your Bounty
First, give your lavender stems a gentle shake to dislodge any dust or tiny garden critters. If they seem particularly dusty, you can give them a very quick rinse under cool water, then gently shake off the excess and pat them lightly with paper towels or let them air dry for a bit on a clean cloth. The key is to ensure they aren’t overly wet before bundling.
Next, strip the leaves from the lower two-thirds of the stems. This helps with air circulation during drying and makes the bundles neater. Gather 8-15 stems into a small bunch. Secure the bundle with a rubber band, twine, or string. Don’t tie it too tightly at the base; you want to allow for some air movement between the stems and for the stems to shrink slightly as they dry.
 Artistically arranged small lavender bundles tied with string, ready for the air drying process, placed beside a classic decorative bust.
Mastering the Art: How to Dry Lavender Like a Pro
Now for the main event – drying your beautifully prepped lavender! There are several methods you can use, each with its own charm.
The Classic Hang: Air Drying Lavender
This is the most traditional and, many would argue, the best method for preserving lavender’s color and fragrance. It’s wonderfully simple!
Hang your lavender bundles upside down in a dark, warm, dry, and well-ventilated area. Think of places like an airy attic, a spare closet (perhaps with the door slightly ajar for circulation), or a dry utility room. Hanging them upside down encourages the essential oils to flow down into the flower buds.
Patience is key here; air drying can take anywhere from one to three weeks, depending on humidity levels and the thickness of the stems. You’ll know your lavender is perfectly dry when the stems are stiff and the flower buds feel crisp and easily fall off when gently rubbed.
Sun-Kissed Drying: Using Solar Power
While drying in direct sunlight is an option and can be quicker (a few days), it’s generally not the preferred method if you want to retain the richest color and most potent fragrance. The sun’s rays can cause the beautiful purple hues to fade and may diminish some of the delicate essential oils. If you choose this route, keep a close eye on your bundles and bring them indoors at night or during damp weather.
A Little Kitchen Magic: Oven Drying Lavender
If you’re short on time, your oven can come to the rescue, but use this method with caution.
Preheat your oven to its absolute lowest temperature setting – ideally around 100-180°F (35-80°C). Anything hotter risks “baking” your lavender.
Spread the lavender stems in a single layer on a baking sheet lined with parchment paper. Place the baking sheet in the oven and prop the oven door open slightly to allow moisture to escape and to maintain good air circulation.
Check your lavender frequently, perhaps every 20-30 minutes. It can take anywhere from 1 to 2 hours to dry completely. The goal is crisp, not cooked!
 A rustic wicker basket filled to the brim with beautifully fragrant, air-dried lavender sprigs, showcasing successful preservation.
The Speedy Route: Using a Dehydrator for Lavender
A food dehydrator offers a controlled environment for drying herbs and is another excellent option if you have one.
Arrange the lavender stems or individual buds in a single layer on the dehydrator trays. Set your dehydrator to a low temperature, typically an “herb” setting, which is usually around 95-115°F (35-45°C).
Drying time can vary from 2 to 4 hours, depending on your dehydrator and the moisture content of the lavender. Check periodically until the lavender is crisp and dry.
Preserving Perfection: Storing Your Dried Lavender
Once your lavender is perfectly dried, proper storage is key to keeping that heavenly scent and lovely color for as long as possible.
Keeping the Scent Alive: Best Storage Practices
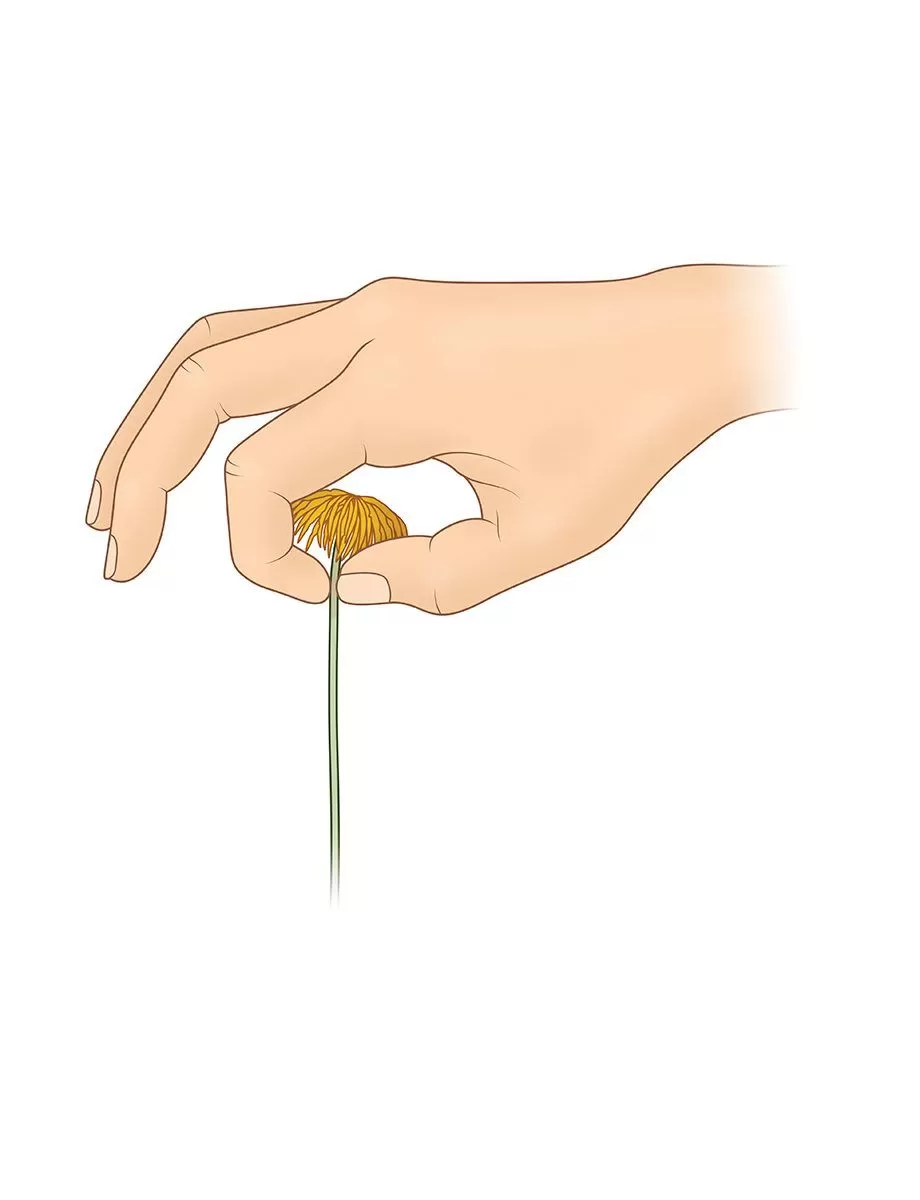
Ensure your lavender is completely dry before storing to prevent any chance of mold. You can choose to store the lavender sprigs whole, or you can gently strip the dried buds from the stems by rolling them between your fingers over a clean bowl.
Store your dried lavender in airtight containers. Glass jars with tight-fitting lids are ideal. To best protect the color and fragrance from degradation, keep these containers in a cool, dark place, away from direct sunlight and heat. Dark-colored glass jars offer even better protection.
Stored correctly, your dried lavender can retain its fragrance for many months, often a year or even longer! If the scent starts to fade, you can often revive it by gently crushing the buds.
 Close-up view of aromatic dried lavender buds and cut stems spread across a rustic wooden table surface, ready for crafting or storage.
Beyond the Vase: Creative Uses for Your Dried Lavender
Now for the fun part – enjoying your beautifully dried lavender! The possibilities are nearly endless.
Culinary Delights with a Floral Twist
A touch of lavender can add a sophisticated floral note to your cooking and baking. Use dried lavender buds sparingly, as their flavor is potent. Try them in:
- Teas: Blend with other herbs for a calming brew.
- Baked Goods: Infuse into shortbread, scones, cakes, or cookies.
- Infusions: Create lavender-infused sugar, salt, honey, or even vinegar.
- Spice Blends: A classic component of Herbes de Provence.
Soothing Aromatherapy and Home Fragrance
Lavender’s calming scent is legendary.
- Sachets: Fill small fabric bags with dried lavender buds to tuck into drawers, closets, or under pillows for a soothing aroma. I still remember the comforting scent of lavender sachets my grandmother used to place in our linen closet – a simple touch that made everything feel cozier.
- Potpourri: Combine with other dried botanicals for a beautiful and fragrant display.
- Dream Pillows: Mix with other calming herbs for a restful night’s sleep.
- Bath Soaks: Add buds to a muslin bag and toss into a warm bath for a relaxing spa experience.
Charming Decorations and Gifts
Dried lavender’s rustic elegance makes it perfect for decorations.
- Wreaths: Weave dried lavender sprigs into beautiful wreaths.
- Bouquets: Create simple, long-lasting bouquets or mix with other dried flowers.
- Crafts: Incorporate into handmade cards, candles, or soap.
- Wedding Toss: A fragrant and eco-friendly alternative to confetti.
 Charming galvanized metal bucket overflowing with dried lavender bunches, creating an elegant rustic centerpiece on an outdoor bistro table.
Lavender Lowdown: Quick Tips and FAQs
Here are answers to a few common questions about drying lavender:
Can you dry lavender after it blooms?
Yes, you can still dry lavender after it has fully bloomed. However, for the most intense fragrance and the deepest, most vibrant color, it’s best to harvest it just as the flowers are beginning to open. Fully bloomed lavender might shed its petals more easily and may not be quite as aromatic.
How do you dry lavender flowers without losing color?
The key to preserving lavender’s beautiful color is to dry it away from direct sunlight and excessive heat. Air drying in a dark, cool, well-ventilated space is generally the best method for color retention. Avoid hanging it in sunny windows or overly hot attics.
Does dried lavender lose its smell?
Dried lavender will retain its wonderful fragrance for a surprisingly long time, often for an entire season or more. If stored properly in an airtight container away from light and heat, its scent can last for several years. You can often revive the aroma by gently squeezing or crushing the dried buds to release more of their essential oils.
Your Lavender Drying Adventure Awaits!
Now that you know how to dry lavender, you’re all set to capture its enchanting essence. It’s a simple, rewarding process that allows you to enjoy the calming beauty and versatile uses of this beloved herb long after its summer glory has passed. From fragrant sachets to culinary experiments, your home-dried lavender is sure to bring a touch of handmade charm to your life.
We’d love to hear about your lavender drying experiences! Share your favorite tips, tricks, or how you love to use your dried lavender in the comments below. And if you found this guide helpful, please feel free to share it with your fellow garden enthusiasts!