- Beat the heat naturally with the power of plants.
- Learn how vertical indoor gardens can contribute to a cooler, more comfortable home environment.
- Discover a step-by-step guide to building a beautiful, functional vertical garden structure.
- Explore suitable plant choices that offer both aesthetic appeal and potential cooling benefits.
- Bring the beauty and benefits of nature indoors with a DIY project.
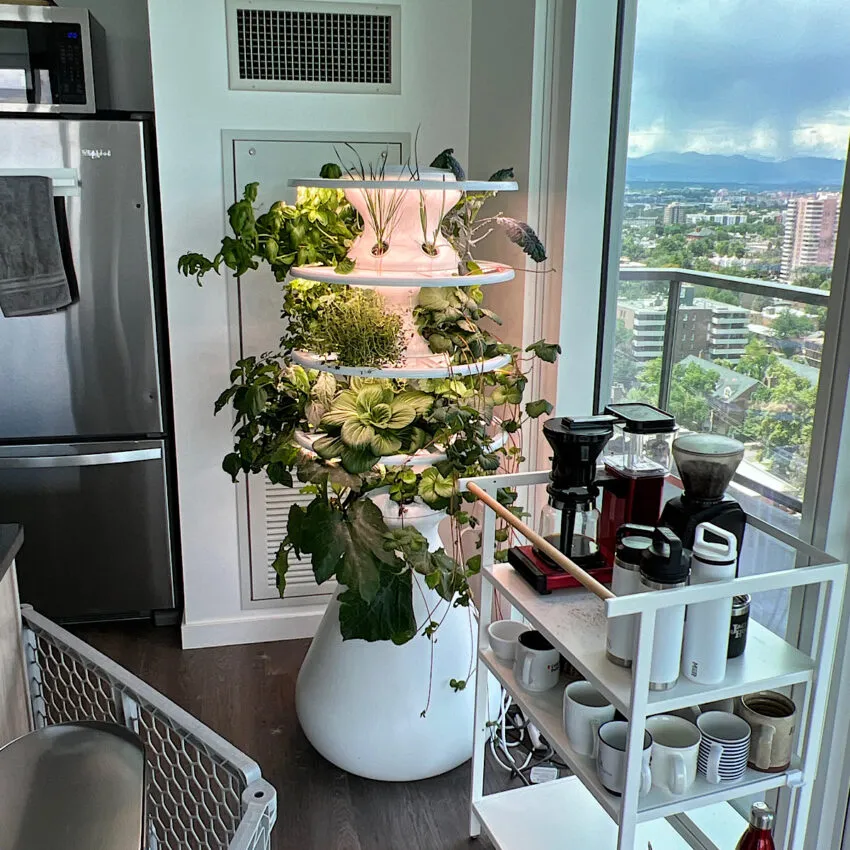
Imagine stepping into a room on a warm day and feeling a subtle, natural coolness. While not a replacement for air conditioning, installing vertical indoor gardens can genuinely contribute to a more pleasant indoor climate, all while adding stunning natural beauty and boosting air quality. This isn’t just about decoration; it’s about harnessing the incredible power of plants right inside your home. A living wall or vertical arrangement isn’t just a feast for the eyes; it’s a microclimate creator, working quietly to make your living space a greener, cooler, and healthier sanctuary. Let’s explore how these living masterpieces work their magic and how you can build your own.
The Green Advantage: How Plants Cool Your Home
Plants are natural engineers when it comes to regulating temperature. They release moisture into the air through a process called transpiration. This process is similar to how sweating cools your body; as water evaporates from the plant’s leaves, it draws heat from the surrounding air, effectively cooling the area. Grouping plants together in a vertical garden enhances this effect, creating a localized cooling zone.
Beyond cooling, indoor plants offer numerous other benefits:
- Air Purification: They absorb carbon dioxide and release oxygen, and many species filter out common indoor pollutants like formaldehyde and benzene.
- Humidity Regulation: Transpiration also adds healthy moisture to dry indoor air.
- Stress Reduction: Studies show that being around plants can lower stress levels and improve mood.
- Noise Reduction: The leaves and structure of plants can help absorb sound, reducing ambient noise.
While the project shown in the photos here uses faux plants (a great option for zero maintenance or in challenging spots!), the structure is perfectly suited for a real living vertical garden. Understanding the potential benefits of real plants motivates building this foundation.
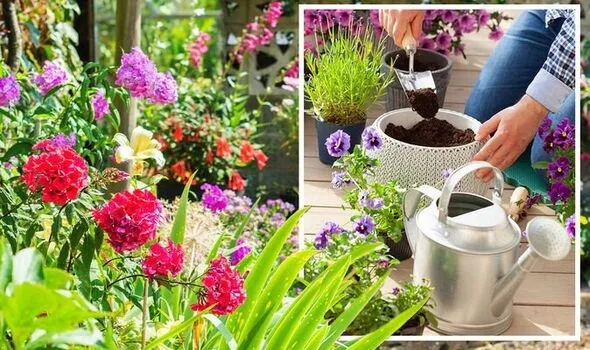
Choosing Plants for Cooling & Style
Selecting the right plants is key for a thriving vertical garden that also contributes to cooling and air quality. Look for plants known for good transpiration rates and adaptability to indoor vertical environments. Trailing and vining plants are often excellent choices as they cover more surface area, maximizing the cooling effect.
Here are a few examples of plants suitable for vertical gardens, known for their air-purifying and potentially cooling qualities (if opting for real plants):
- Pothos (Epipremnum aureum):
- Common Name: Golden Pothos, Devil’s Ivy
- Zone: 10-11 (as perennial); grown indoors anywhere
- Light: Low to bright indirect light
- Humidity: Moderate to high
- Water: Allow soil to dry out between waterings
- Spider Plant (Chlorophytum comosum):
- Common Name: Spider Plant, Air Plant
- Zone: 9-11 (as perennial); grown indoors anywhere
- Light: Bright to moderate indirect light
- Humidity: Average to high
- Water: Keep soil moderately moist, allow top inch to dry out
- Ferns (various species like Boston Fern – Nephrolepis exaltata ‘Bostoniensis’):
- Common Name: Boston Fern
- Zone: 9-11 (as perennial); grown indoors anywhere
- Light: Medium to bright indirect light
- Humidity: High is preferred
- Water: Keep soil consistently moist but not waterlogged
- Philodendron (various species):
- Common Name: Heartleaf Philodendron, Brasil Philodendron
- Zone: 9-11 (as perennial); grown indoors anywhere
- Light: Low to bright indirect light
- Humidity: Average
- Water: Allow soil to dry out between waterings
When using real plants in a vertical garden like the one described below, consider the watering implications. Terra cotta pots can dry out quickly, and ensuring even watering without dripping can be a challenge. Using waterproof liners or self-watering systems might be necessary for a large-scale real plant setup. For this DIY project, the original builder opted for high-quality faux plants, offering the visual benefit without the maintenance complexity, while still creating the framework for a potential future living wall.
Building Your DIY Vertical Garden Structure
Creating a beautiful vertical garden doesn’t require complex tools or advanced carpentry skills. This hanging shelf system provides a sturdy and attractive base for displaying your plants, whether real or faux. Here’s how you can build it:
Materials You’ll Need:
- Two 6-foot 1×6 boards (pine is a good, workable option)
- 3/16″ cotton rope
- Hooks for hanging
- 12 terra cotta pots (approx. 4.5″ diameter)
- 12 plants (real indoor plants or high-quality faux ones)
- Floral foam (optional, for faux plants)
- Wood conditioner
- Wood stain
- Polyurethane clear coat
Tools You’ll Need:
- Tape measure
- Pencil
- Speed square
- Drill & drill bits (including a 5/8″ bit)
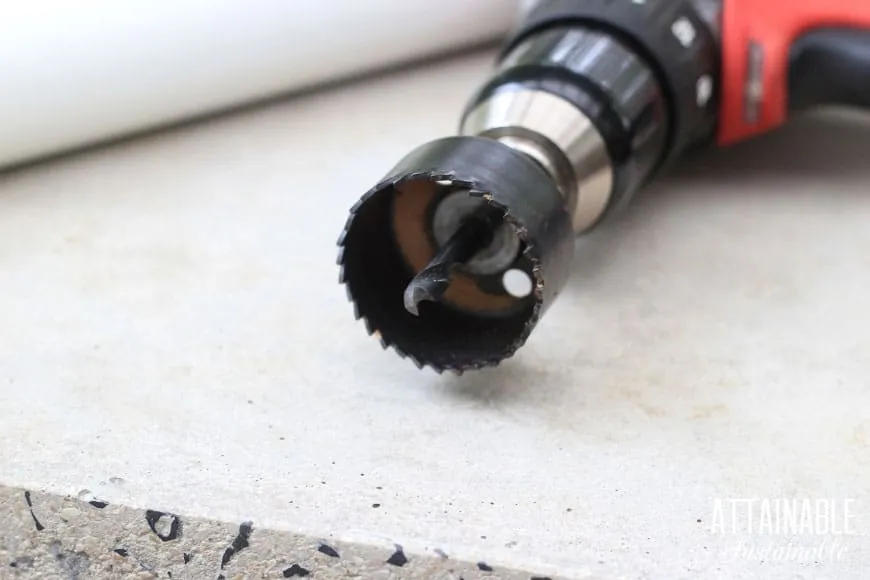
- Hole saw (sized for your pots, e.g., 4.5″)
- Chop saw or reciprocating saw
- Paintbrush
- Rag
- Orbital sander & 120 grit sanding disk
- Clamps
- Stud finder
Step-by-Step Guide to Constructing Your Hanging Garden Shelves
This process focuses on building the wooden shelves and rope system. Remember to follow safety precautions when using tools.
1. Cut Your Boards
Start by cutting your 6-foot boards into shorter sections for your shelves. For a garden that’s 3 feet wide with three shelves, cut each 6-foot board in half, yielding four 3-foot pieces. You’ll use three for the shelves and have one spare for testing cuts and finishes.
Woman using a chop saw to cut a wooden board to size for crafting DIY vertical garden shelves.
2. Mark Hole Locations
Decide how many pots you want on each shelf and mark their positions. For four pots spaced evenly across a 3-foot shelf, measure and mark the center points for each pot opening. Also, mark the four corner points where the rope will pass through to suspend the shelves.
 measuring tape and hand with pencil marking board to make DIY vertical garden planter
3. Cut Holes for Pots
Using a hole saw attached to a drill press (or carefully with a jigsaw), cut out the circular openings marked for your pots. Ensure the hole size allows the pot to sit securely, typically with the rim resting on the wood. Cut four holes in each of the three shelf boards.
 woman using a drill press and hole saw to cut holes in board to hold indoor hanging plants in terra cotta pots
 close-up of woman using drill press to cut hole in indoor vertical garden shelf to hold pots with faux hanging plants
 hands using screw driver to remove wood cutout from hole saw on a drill press to make a vertical garden
4. Drill Rope Holes
Clamp each board firmly to your workbench. Use a 5/8″ drill bit to drill a hole at each of the four marked corner points on every shelf. These holes will accommodate the support ropes.
Close-up of hands using clamps to secure a wooden shelf board to a workbench before drilling, part of the vertical garden construction process.
 close-up of handing using drill to drill holes in a wood vertical wall garden shelf
5. Sand Smooth
Sand all surfaces and edges of your cut boards thoroughly with 120 grit sandpaper. This removes rough edges and prepares the wood for finishing. An orbital sander makes this quicker, but hand sanding is also effective. Wipe down the boards with a damp rag afterward to remove sawdust.
 close-up of orbital sander sanding wood vertical garden shelf with holes for faux hanging plants
6. Apply Wood Conditioner
If using softwood like pine, apply a pre-stain wood conditioner. This helps the stain absorb evenly, preventing blotchy results. Brush it on and let it dry according to the product’s instructions, usually overnight.
7. Stain the Wood
Apply your chosen wood stain with a paintbrush. Let it penetrate the wood for 15-20 minutes, then wipe off the excess with a clean rag. Pay attention to the cut ends, which absorb stain more readily – wipe these sooner if needed to achieve a uniform color. Allow the first coat to dry completely (at least two hours).
 wood stain being applied with a paintbrush to vertical garden planters
 Freshly stained wooden shelves for a DIY vertical garden project, showing the rich color achieved after staining.
8. Apply a Second Coat (if needed)
If you desire a darker or richer color, apply a second coat of stain using the same method. Allow it to dry thoroughly.
 brush applying 2nd coat of wood stain to artificial vertical garden planter
9. Protect with Polyurethane
Apply a thin, even coat of polyurethane clear coat to protect the wood from moisture and wear. Brush it on and let it dry completely. It might look milky initially but dries clear. Allow several hours for drying.
 close-up of paintbrush being dipped into open can of Varathane polyurethane clear coat sealer with vertical garden shelves in the background
Detailed view of a wooden vertical garden shelf showing a wet, clear coat of polyurethane sealer being applied to protect the wood surface.
10. Cut Rope Lengths
Cut four equal lengths of cotton rope for hanging your garden. The total length will depend on your desired height and the spacing between shelves.
 lengths of rope cut to hang a DIY vertical garden with faux hanging plants
11. Tie Base Knots
Tie a simple knot near one end of each of the four rope lengths. These will support the bottom shelf. Don’t tighten them fully yet, as you may need to adjust them later for leveling.
 close-up of hand holding end of rope with a knot being tied to hang a diy vertical garden planter
12. String the Bottom Shelf
Feed one rope end through each of the four corner holes on your bottom shelf. Tie a knot underneath each hole to support the shelf, resting it on the knots. Again, keep these knots loose for now.
 close-up of hand using a skewer to poke rope through a hole drilled in a vertical garden shelf
 all three vertical wall garden shelves on the floor, and the bottom one being strung onto rope.
13. Measure Shelf Spacing
Lay the bottom shelf on the floor with the ropes extending upwards. Measure the desired distance to the next shelf and mark this point on each of the four ropes. Consistency is key here.
 woman using measuring tape to mark the correct length of rope to hang an indoor wall garden with faux plants
14. Tie Knots for the Next Shelf
Tie a knot at the marked spot on each of the four ropes. These knots will support the second shelf.
 close-up of hand holding rope tied in a very loose knot to hold up an indoor vertical garden
15. Add Subsequent Shelves
Thread the four ropes through the corner holes of the second shelf, allowing it to rest on the knots you just tied. Repeat the measuring and knot-tying process for the third shelf.
16. Install Wall Hooks
Locate studs in your wall using a stud finder – it’s crucial to hang your garden from something solid as it will be heavy, especially with pots and plants. Drill pilot holes and screw sturdy hooks into the studs at the desired height and spacing for your vertical garden.
 hand holding a drill, drilling into upper corner of a white wall to hang an artificial vertical garden
 hands screwing a hook into the wall to hold up a vertical wall garden
 two hooks in the wall, ready to hang a vertical wall garden with faux hanging plants
17. Hang Your Garden
Carefully lift your assembled vertical garden structure and loop the top ends of the ropes onto the installed wall hooks.
A person hanging the completed wooden and rope structure of a DIY vertical garden onto hooks mounted on a wall.
18. Adjust and Level Shelves
Now is the time to adjust the knots below each shelf to get them perfectly level. Start with the top shelf and work your way down. Using a small level on each shelf can help. Adding the pots (with or without plants) can also help weigh the shelves down and show you where adjustments are needed.
 close-up of hands adjusting knots in the ropes suspending wood vertical garden shelves
A level placed on one of the wooden shelves of the vertical garden structure, demonstrating the process of ensuring each shelf is perfectly horizontal.
Add Your Plants and Pots
Place your terra cotta pots into the cutouts on the shelves. If using faux plants, you might use floral foam to hold them in place within the pots. If using real plants, pot them appropriately before placing them in the holes.
A hand inserting the stem of a faux plant into a piece of floral foam placed inside a terra cotta pot, preparing it for the vertical garden.
Enjoy Your Greener Space!
Whether you choose the low-maintenance beauty of faux plants or the living, breathing benefits of real ones, this DIY vertical garden structure is a fantastic way to add visual interest and potentially enhance your indoor environment. Installing vertical indoor gardens is more than just a decor trend; it’s an investment in your home’s comfort and aesthetic. The satisfaction of building it yourself only adds to the reward!
 side angle view of DIY vertical garden with terra cotta pots and indoor hanging plants
 Boho DIY indoor vertical garden with indoor hanging plants in terra cotta pots
Close-up view of a section of the DIY indoor vertical garden, highlighting the details of the wooden shelves, ropes, and the plants housed in terra cotta pots.
Have you tried building your own vertical garden? Share your experiences or ask questions in the comments below! If you found this guide helpful, share it with fellow plant lovers. And be sure to explore more gardening and decorating ideas on Thelittle.garden!