- Protection from pests: Keep critters out and your veggies safe.
- Modular design: Customize the size and shape to fit your space.
- Step-by-step guide: Easy-to-follow instructions for DIY success.
- Durable and long-lasting: Treated lumber and metal roofing for years of gardening enjoyment.
An enclosed raised garden bed is a game-changer for any gardener, especially those battling hungry deer or other persistent pests. It offers a protected environment for your plants to thrive, while also adding a beautiful and functional element to your landscape. This detailed guide will walk you through building your very own enclosed raised garden bed, offering tips and tricks learned from a real-life project. We’ll cover everything from material selection to construction, ensuring you’re equipped to create the perfect enclosed raised garden bed for your backyard.
Contents
Planning and Materials
Careful planning is crucial for a successful build. Determine the desired size and shape of your enclosed raised garden bed, keeping in mind the available space and the types of plants you intend to grow. A modular design, where individual raised beds are connected, offers flexibility and allows for future expansion.
For this project, we used:
- Treated lumber (2x4s and 5/4 boards)
- Nails and screws
- Chicken wire or other fencing material
- Metal roofing material
- Plastic sheeting
- Pavers (optional, for a stable base)
Building the Raised Beds
The construction process begins with building individual raised bed units. These are essentially rectangular boxes, similar to framing a small wall. Use treated lumber for durability and longevity.
- Cut the 2x4s to the desired dimensions for the frame.
- Assemble the rectangular frames using nails and screws.
- Add internal bracing for extra support, especially if you plan on filling the beds with a significant amount of soil.
- Attach the slatted material to the exterior of the frame, creating the sides of the raised bed.
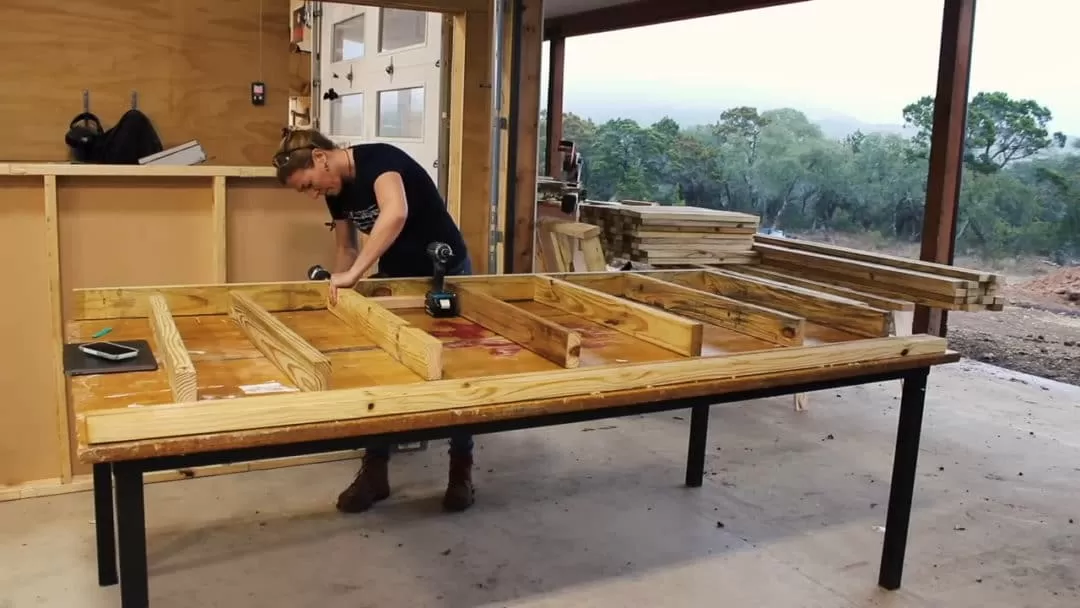 Building the frame of the raised garden bed.
- Attach legs to the bottom of the frame. The height of the legs will determine the overall height of the raised bed. Consider shorter legs for the front and taller legs for the back to accommodate fencing.
 Completed raised garden bed units ready to be moved.
Connecting and Enclosing
Once the individual raised beds are complete, connect them to create the desired shape and layout. This modular approach offers great flexibility.
- Position the raised beds on a level surface, such as pavers.
- Connect the beds by attaching the open ends together with screws.
- Attach the skirting around the bottom perimeter of the connected beds. This helps prevent smaller animals from entering.
- Build the framing for the fencing using the taller back legs as support.
- Attach the fencing material to the frame, ensuring it’s taut and secure.
 Enclosed raised garden bed with fencing.
Finishing Touches
With the structure complete, add the final touches for enhanced functionality and longevity.
- Install a metal roofing bottom in each raised bed for drainage and added protection against rot.
- Line the inside of the raised beds with plastic sheeting to further protect the wood from moisture.
 Metal roofing being installed in the raised garden bed.
 Lining the raised garden bed with plastic.
- Consider adding a gate for easy access to the enclosed area.
- Apply a weather-resistant finish to the wood for added protection against the elements.
 Finished enclosed raised garden bed with gate.
Conclusion
Building an enclosed raised garden bed is a rewarding project that provides numerous benefits for gardeners. By following these steps and adapting the design to your specific needs, you can create a beautiful and functional space to enjoy the fruits (and vegetables!) of your labor for years to come. We’d love to hear about your experiences building your own enclosed raised garden bed! Share your tips and photos in the comments below. And don’t forget to explore Thelittle.garden for more gardening inspiration and advice.